In this article, we will explain the steps you need to follow to get Azure Subscription details such as Client Identifier, Tenant Identifier, Application Secret Key, and the Publish Settings file from Azure. Let's assume you are trying to connect BizTalk360 with Azure Active Directory. We will explain the detailed process of adding BizTalk360 to the Active Directory and retrieving the subscription details.
This process consists of the following steps:
Adding BizTalk360 to Active Directory and retrieving the subscription details
Minimum Permissions Required
Adding the Azure Subscription details to BizTalk360
Adding BizTalk360 to Active Directory & retrieving the subscription details
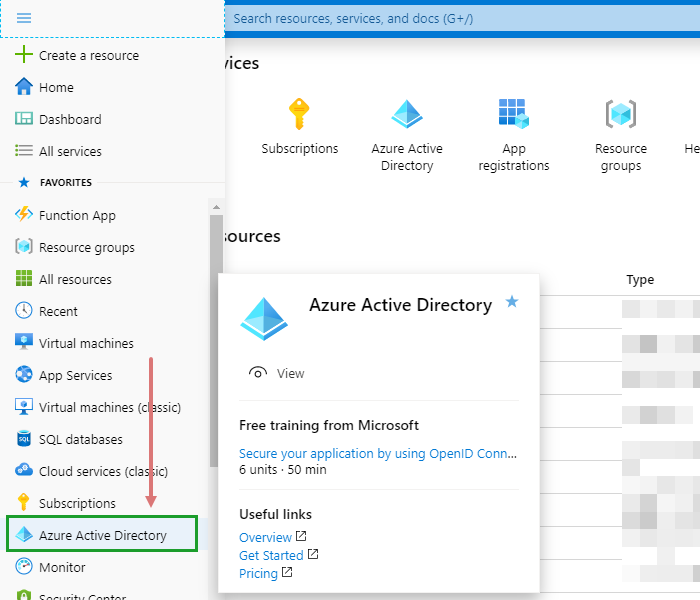
Log in to the Azure Portal
Click "Azure Active Directory" from the left navigation menu.
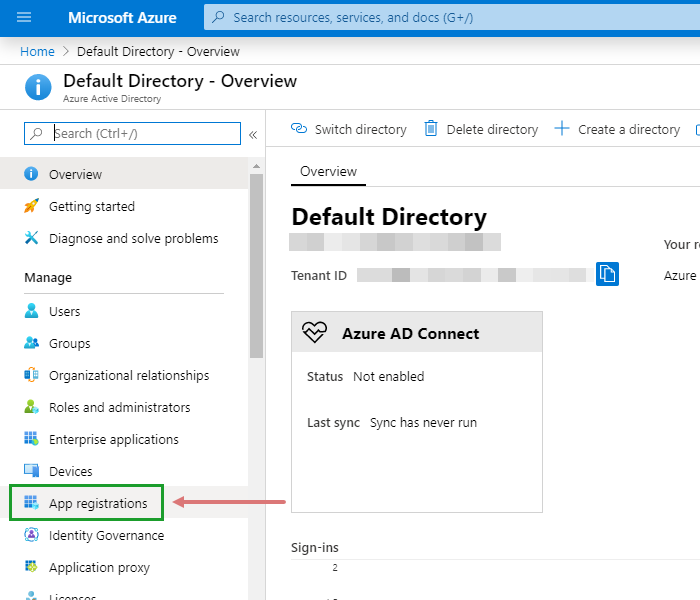
Select "App registrations" from the list
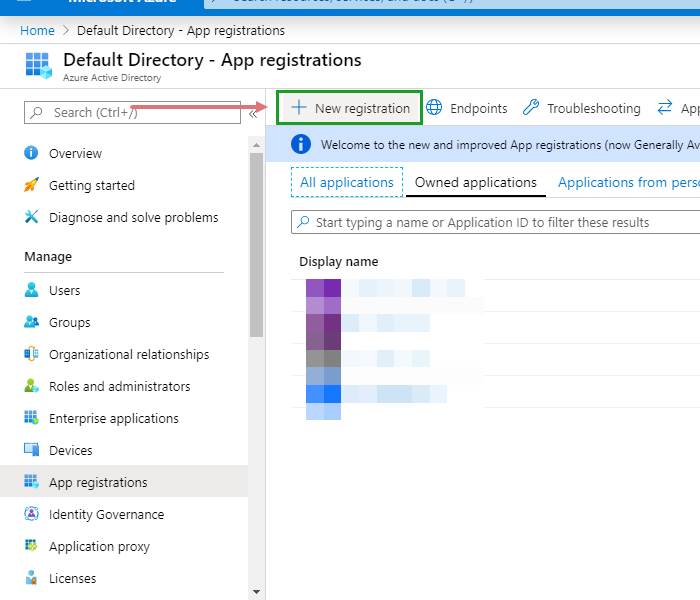
Click “New registration”, to add BizTalk360 as an application into your Azure Active Directory
Enter a Name for the application that you want to add to the Azure Active Directory. Ex: BizTalk360. Choose the Application Type as “Web app / API”
Enter the Sign-On URL (the URL where you can sign-in and use the application) and App ID URI (a unique URI that Azure AD can use for this application). This URL can be changed later. For now, http://localhost/BizTalk360 will do
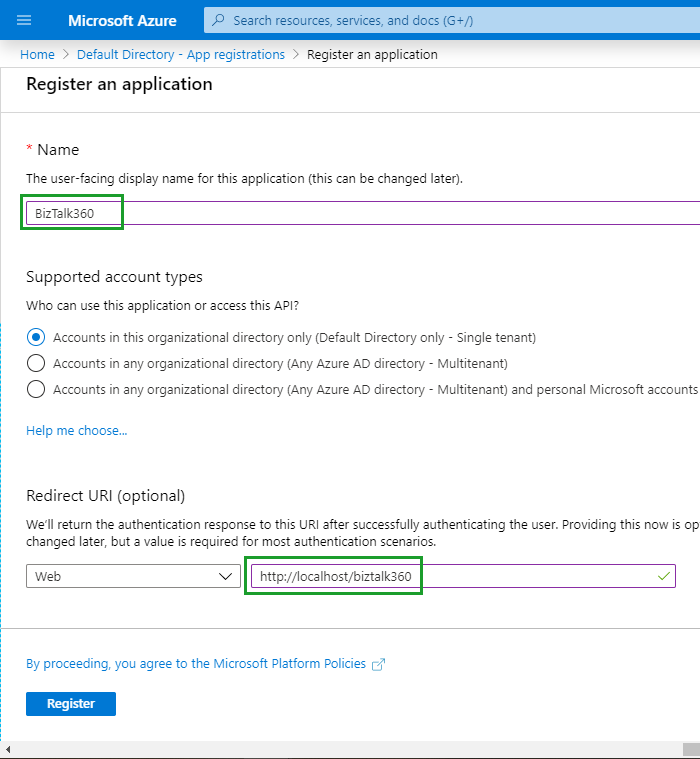
Click the Register button to add/register the new application
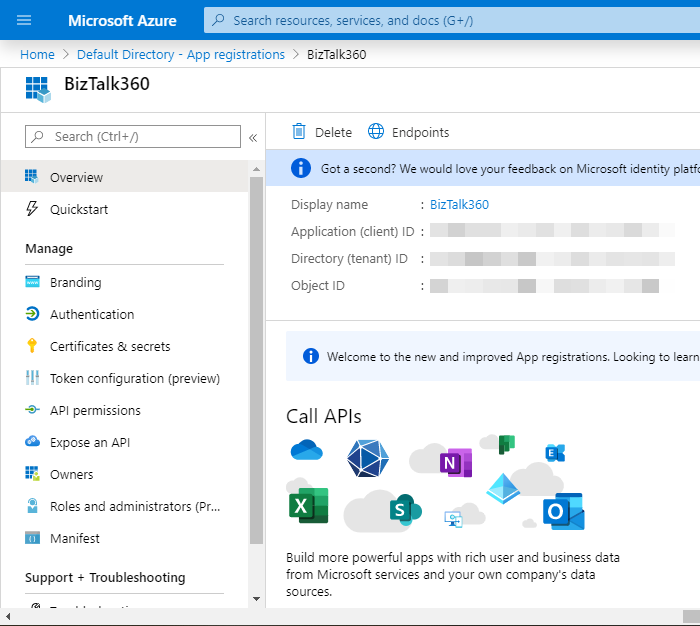
Once the application is created, copy the Application ID (Application Identifier) in the portal, which will be applied as a Client ID (Client Identifier), copy the Directory ID (Directory Identifier) in the portal, which will be applied as a Tenant ID (Tenant Identifier) in BizTalk360
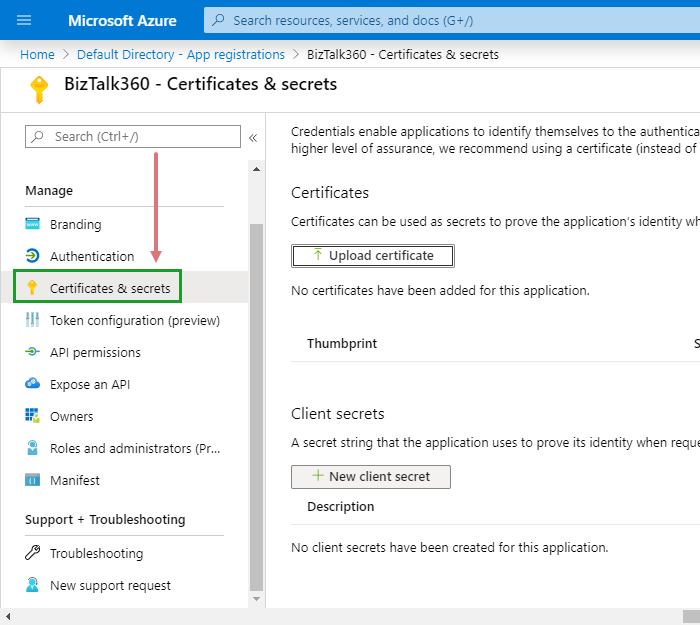
Select "Certificates & secrets" to create a client secret key. Choose the "New Client secret" option.
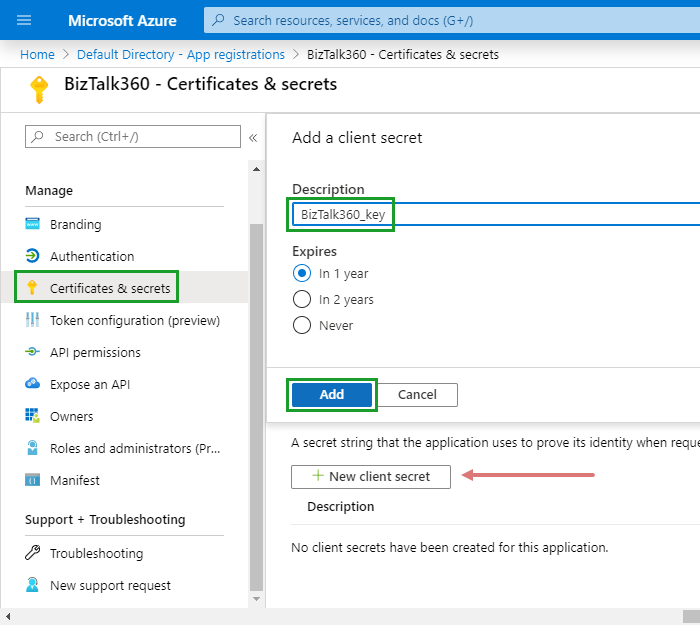
Provide a description, choose the duration of the validity of the keys (say, 1 year or 2 years). The key will be displayed only once when you save the application configuration. This is the Application secret key . Copy this value too
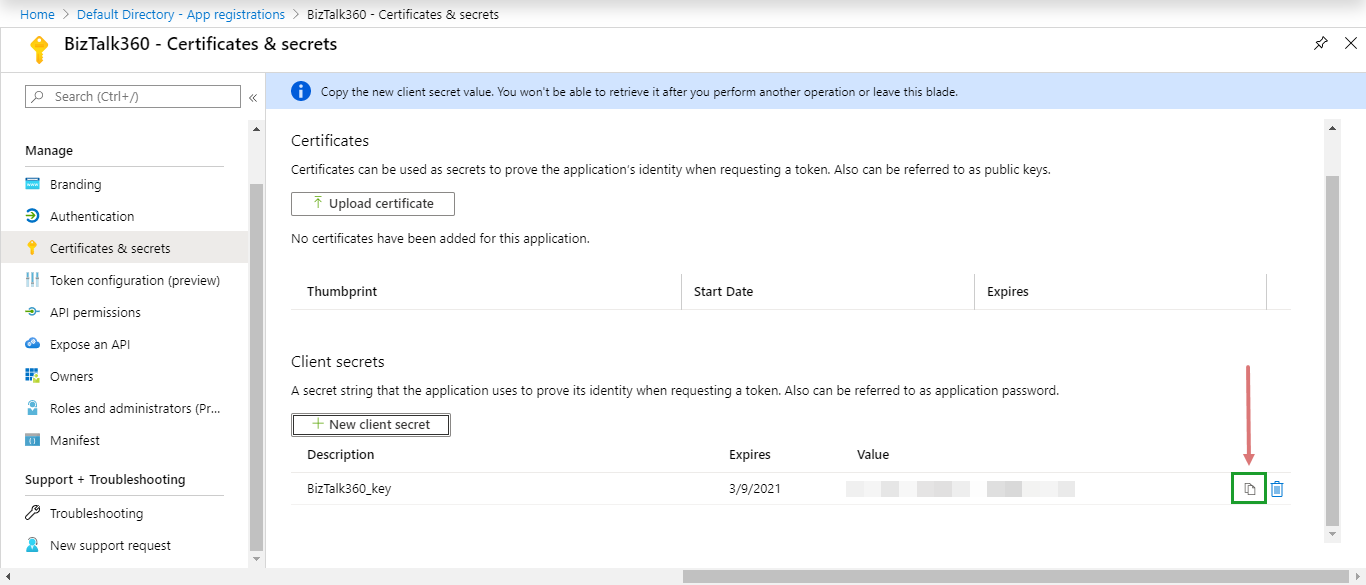
By now, you should have copied the 3 different keys that are required to add the Azure subscription to BizTalk360.
App Service Permissions required at the resource level
The BizTalk360 App service should have "Reader" permission given on the Azure Subscription in general.
Based on the requirement, you can refer to the below table and provide the mentioned permissions to manage your Azure Resources from BizTalk360.
Resource | Minimum Permissions Required |
Azure Subscription | Reader |
Service Bus (Queues and Topics) | Service Bus Data owner |
Logic Apps | Logic Apps Contributor |
Integration Accounts | Reader |
Adding the Azure Subscription details to BizTalk360
In this section, let us look at the process of adding an Azure subscription (with the Client Identifier, Tenant Identifier, and Application Secret key information) to BizTalk360.
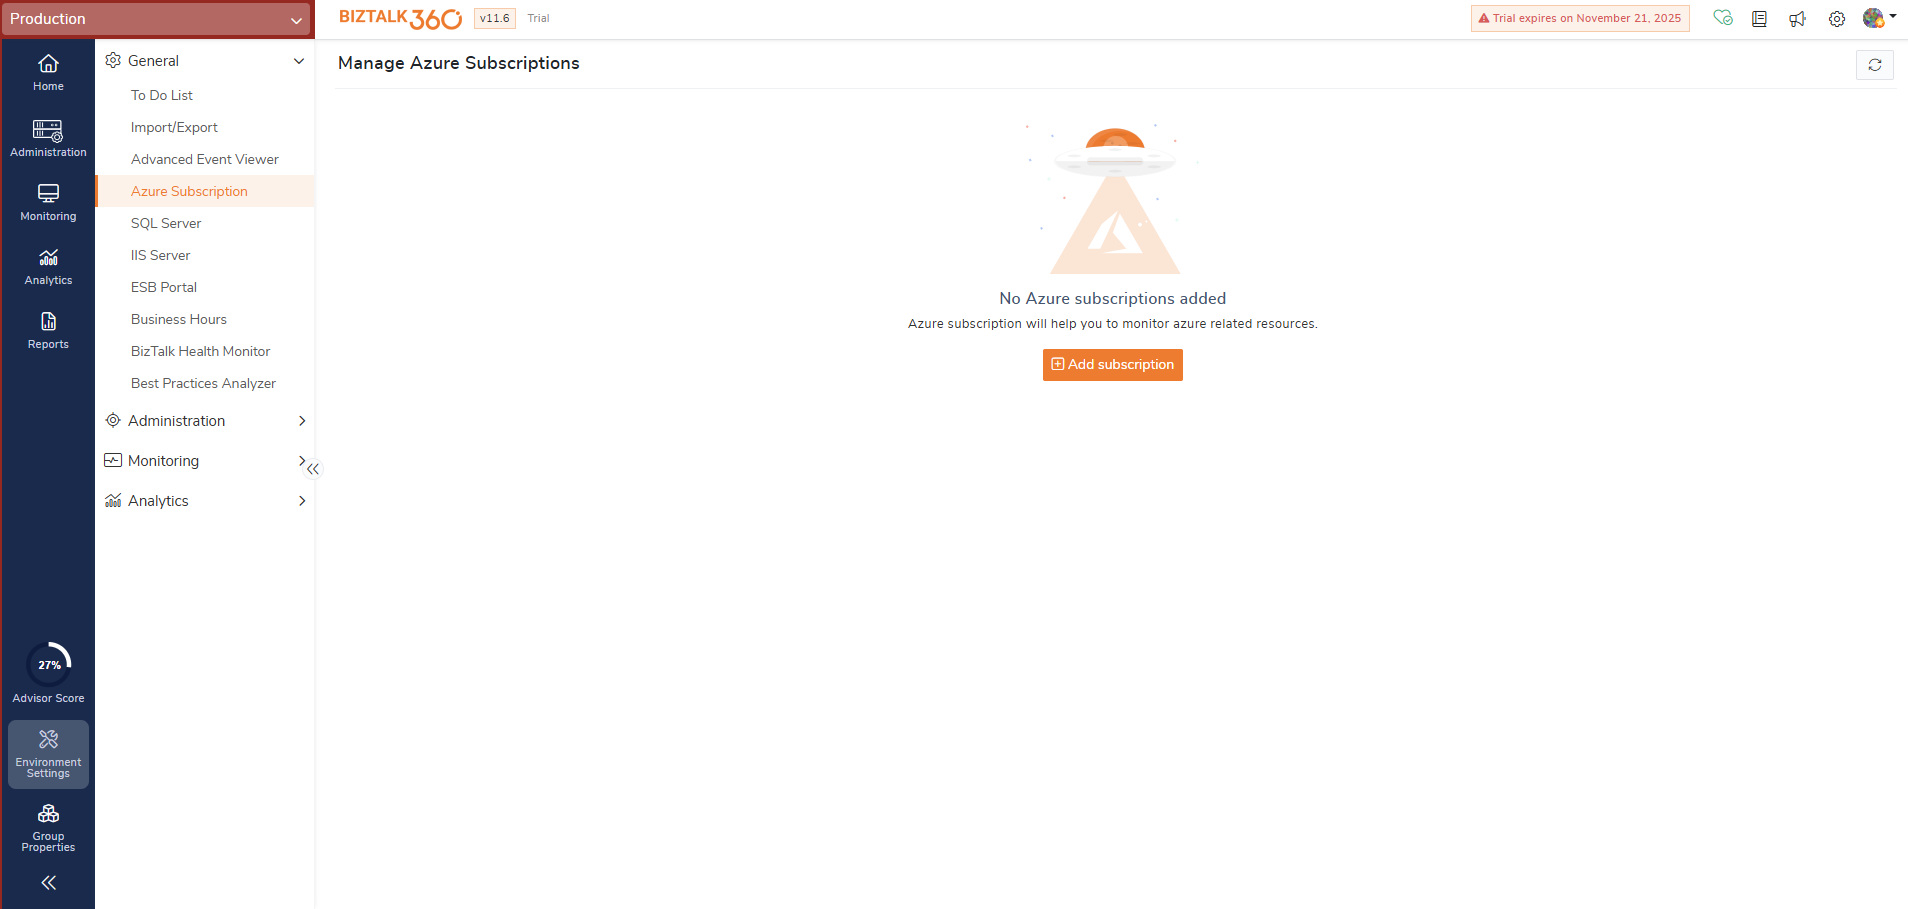
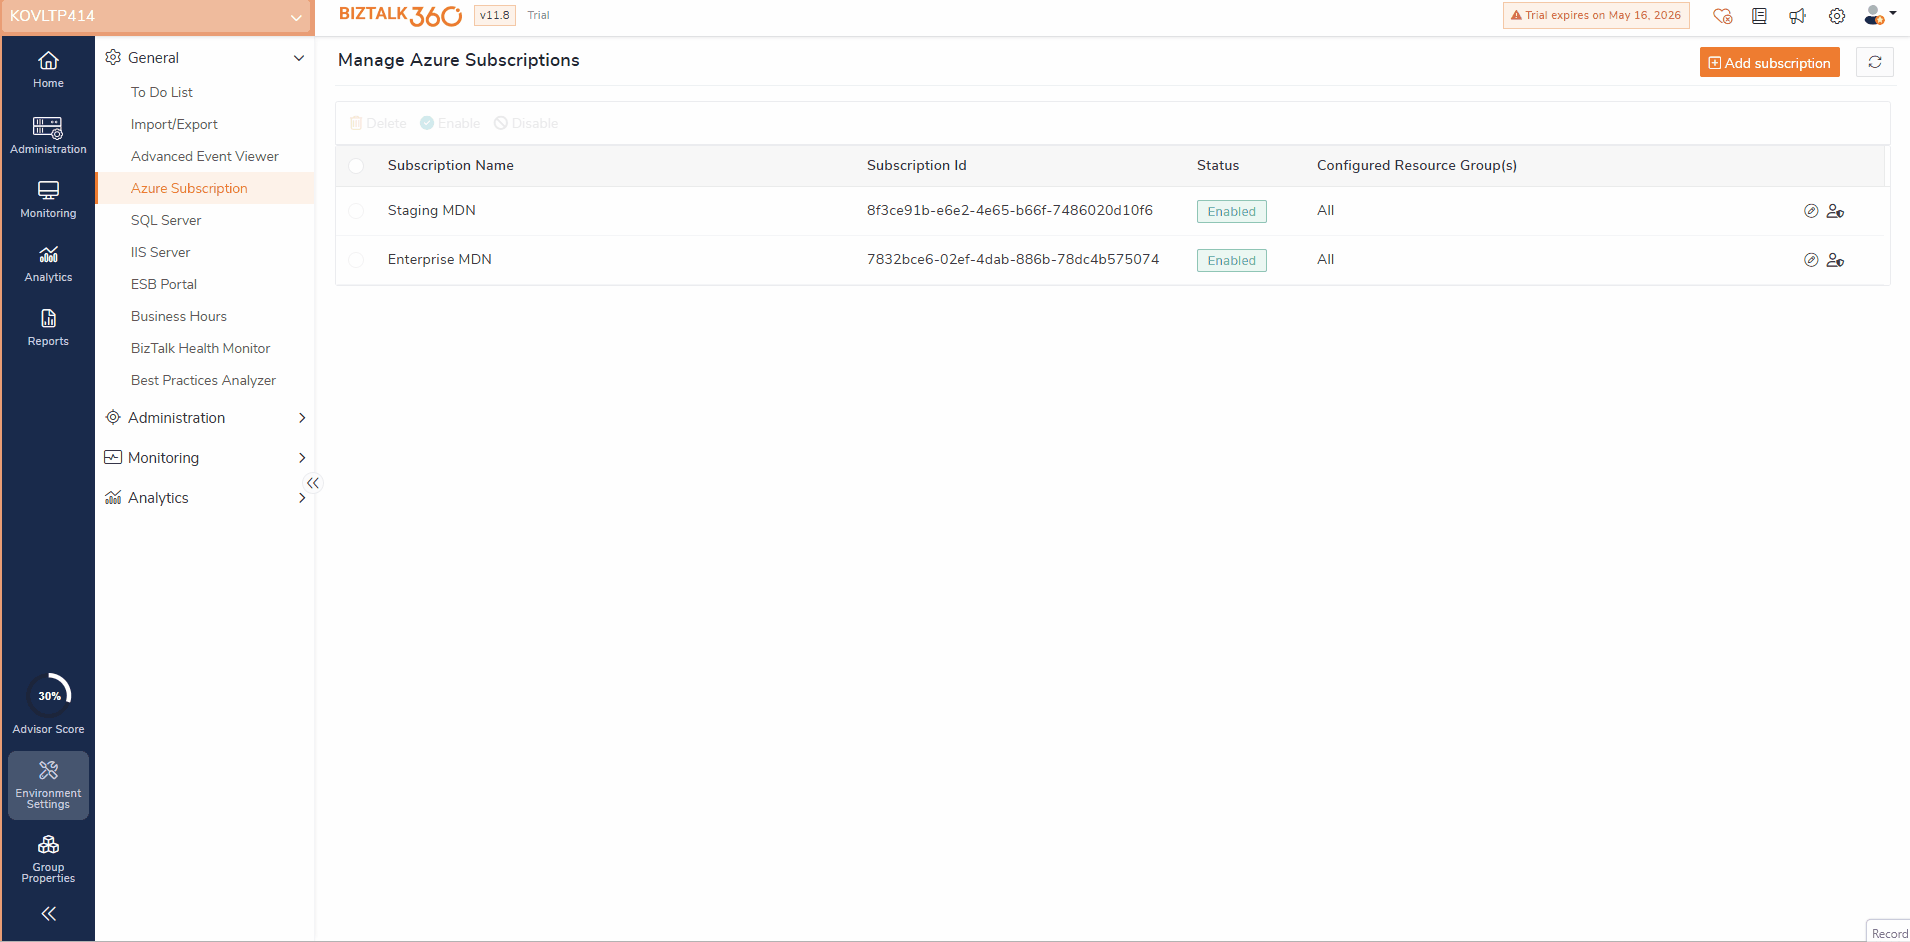
Log in to BizTalk360 (as a Super User). Select the Environment for which you want to add Azure credentials.
Click the Environment Settings icon at the bottom of the screen. Expand General and then select Azure Subscriptions
Click Add Azure Subscription.
4. In the Azure Subscription Details page, you will see the following fields:
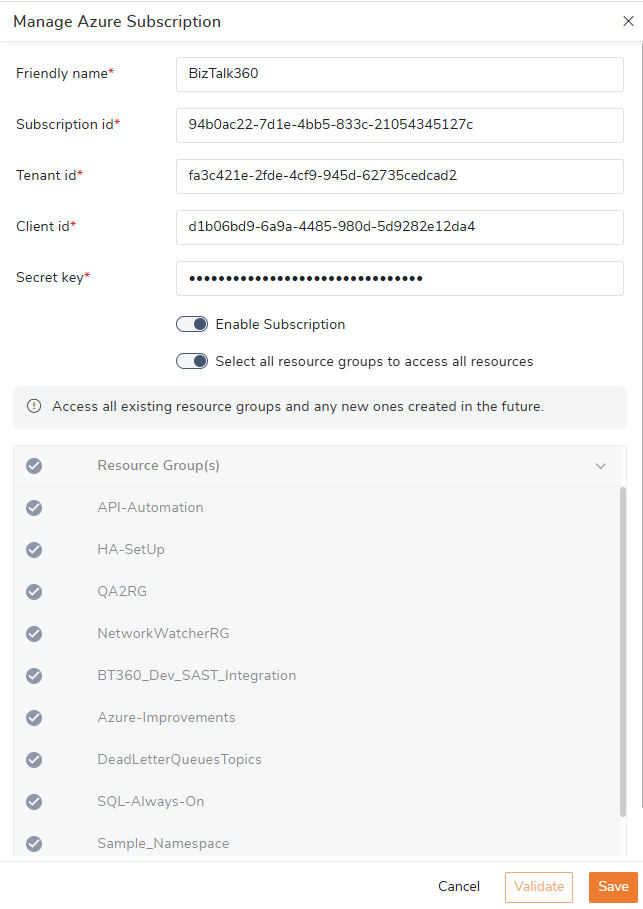
Friendly Name - You can enter a friendly name for the subscription that you are adding to BizTalk360
Subscription Identifier - In order to use Azure services in BizTalk360, a unique GUID is required which is the Subscription identifier.
Tenant Identifier - The identifier that authorizes and provides single sign-on and directory access for the application that you integrated with Microsoft Azure AD
Client Identifier - The unique identifier for the application you integrated with Azure AD
Secret Key - To be able to have BizTalk360 read and/or write data in Microsoft Azure AD, you need to enter the application key.
Enable Subscription for Monitoring or Operation - You need to toggle the icon to the Active state to enable the subscription for monitoring with BizTalk360. If you disable the toggle icon, you will notice the Monitoring Availability status as Not Available
Validate - Click the button to validate the entered subscription details, and all the available resource groups will get listed.
Select all resource groups to access all resources - The “Select all resource groups” option is enabled by default, granting access to all resource groups within the environment. This allows users to manage and monitor all resources associated with these groups through BizTalk360.
However, users can also choose to select specific resource groups to monitor and manage. Restricting access to only the required resource groups helps to optimize the performance .
Save - Click the Save button to save the Azure configuration.
Permission details - The Permission details view provides a clear understanding of user access levels across different scopes in azure. Below permissions required for the service principal to view and manage Azure services within BizTalk360.
Azure Resource
Permission Required
Logic Apps
Logic App Contributor.
Azure Service Bus (Queues and Topics)
Azure Service Bus Data Owner.
API Apps
Website Contributor.
Higher-level role assigned: When a higher-level role (e.g., Owner/Contributor) is assigned, all corresponding lower-level roles are automatically hidden. This avoids redundancy and simplifies the view, since higher-level roles already include lower-level permissions.
Only lower-level permissions assigned: When only a lower-level role is assigned, higher-level roles are still displayed but marked with a red cross. This clearly indicates that those higher-level permissions are not granted.
Azure Subscription Credentials Protection
BizTalk360 is an on-premises solution, all credentials with Azure Subscription configurations are encrypted and securely stored in the BizTalk360 database (within domain). This ensures that sensitive data remains protected and inaccessible to unauthorized users. More importantly, we do not access any of the data.
When you configure Azure Subscription settings in BizTalk360, the system securely stores subscription details using industry-standard encryption mechanisms. This enables the monitoring of essential Azure resources, including:
Logic Apps
Logic Apps Standard
Azure Service Bus Queues
Azure Service Bus Topics
Allowed Domains for Azure Subscription Integration
To successfully add an Azure subscription to BizTalk360, ensure that the following domains are allowed,