Microsoft Teams serves as a chat-based workspace, facilitating collaboration among different teams within an enterprise through a shared workspace. This platform acts as a centralized communication hub, seamlessly integrating features such as instant messaging, video conferencing, file storage, and third-party app integration. In scenarios where critical information cannot be conveyed individually, a unified platform is essential for promptly disseminating important updates to the entire organization or specific groups. Microsoft Teams fulfills this need efficiently. It is designed to seamlessly integrate with a company's Office 365 subscription, offering compatibility with the Office productivity suite and extensions to accommodate non-Microsoft products.
As you cannot post messages directly to a team, you must utilize a channel for this purpose. To establish a connection between BizTalk360 and Microsoft Teams, the initial step involves adding a custom incoming Webhook to your Microsoft Teams channel. An Incoming Webhook serves as a means to transmit data to a service through HTTP calls. After successfully adding the Webhook to your channel, a new Webhook URL will be generated. Through this connector, BizTalk360 notifications will be received by your designated channel.
Important: Teams Webhook Connector is Deprecated!
End of 2024, Microsoft will deprecate the Office 365 connectors used within Teams, including the Webhook Connector. You may read about their announcements here. As a result of this change, the existing Webhook connector(s) will stop working.
Microsoft recommends using Power Automate Workflows to post messages to Teams Channels.
Migrating from the Connector to the Workflow will require some customization to ensure smooth integration with BizTalk360. For detailed steps on migrating to the Workflow, please refer to this document.
Establishing a Microsoft Teams notification within BizTalk360 involves a two-step procedure:
Provide the Webhook details to configure the Microsoft Teams channel in BizTalk360.
Activate the Microsoft Teams Notification channel within BizTalk360 Alarms.
Configuring Microsoft Teams Channel in BizTalk360
Log in to the BizTalk360 application.
Navigate to the Settings option located in the left menu.
Expand the Notifications section from the left menu bar.
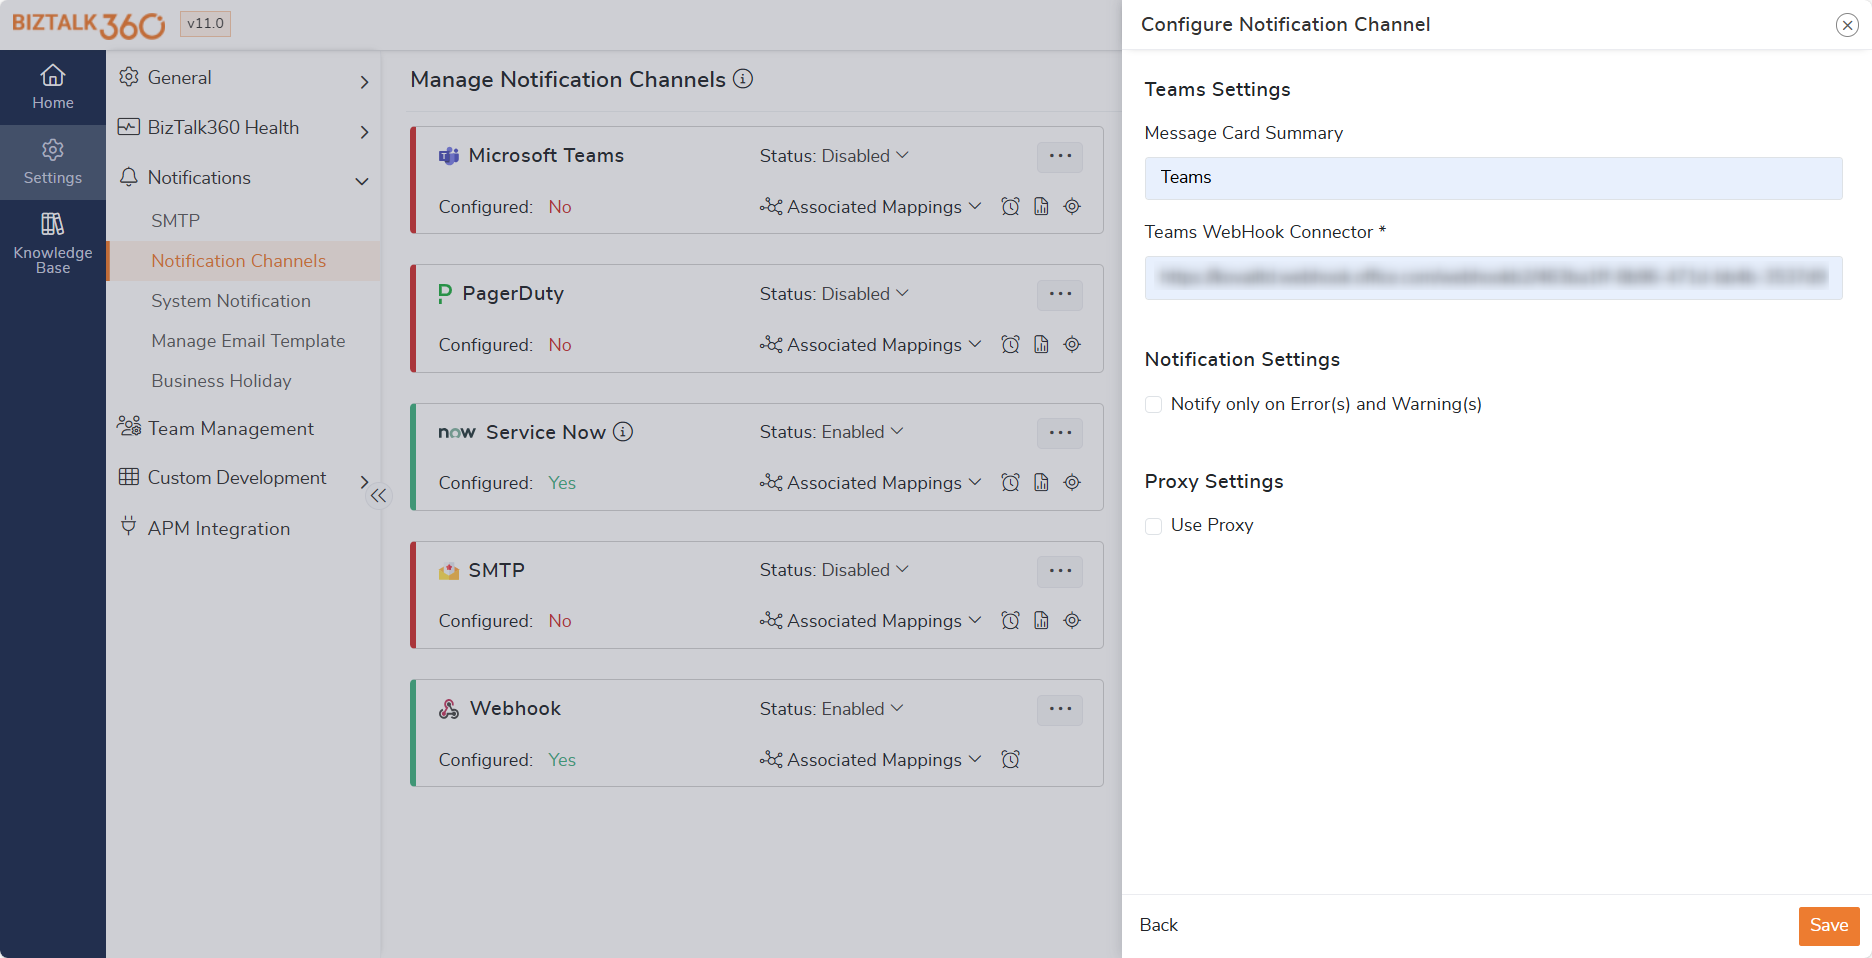
Click on Notification Channels.
Select the checkbox next to the Microsoft Teams Channel name (B360.Notifier.MicrosoftTeamsNotification).
Click the ellipsis icon next to the channel name and choose Edit.
If you don't want to modify the DLL file name and logo, simply click Next.
On the configuration page, provide the Microsoft Teams Webhook URL.
Optionally, you can customize the Teams Message Card by entering a message card summary; this text will be displayed in the Teams Message Card when a BizTalk360 notification is received.
In the Notification Settings, enable "Notify only Error(s) and Warning(s)" if you want to notify only for error and warning states in the alert. Otherwise, artifacts in a healthy state will also be listed in the alert.
If you have configured a proxy in your environment, enable "Use Proxy."
Save the Microsoft Teams configuration settings by clicking the Save button.
After configuring, the "Configured" field will change from No to Yes.
Enabling Microsoft Teams Notification Channel in BizTalk360 Alarm
After successfully configuring the Microsoft Teams channel in BizTalk360, you can activate this notification channel within the Alarm creation section to finalize the setup. BizTalk360 will then begin monitoring the artifact's status according to the specified threshold condition. If there is a violation of the threshold, you will promptly receive alerts through the configured Microsoft Teams notification channel.
To activate the Microsoft Teams notification channel, please adhere to the following steps:
Go to the Home dashboard and click on the Monitoring tab.
Select "Manage Alarms."
Click on "New Alarm."
Choose "Consolidated Monitoring" to create a new alarm.
Provide a meaningful name for the alarm (e.g., "Microsoft Teams Notifications"), along with the email address and a brief alarm description.
In the "Notification Channel(s)" section, you will find Microsoft Teams listed with a toggle icon. Turn on the toggle to enable Microsoft Teams Notifications.
Click "Next" to proceed with alarm creation.
Map the alarm with relevant Application artifacts and the BizTalk Server environment.
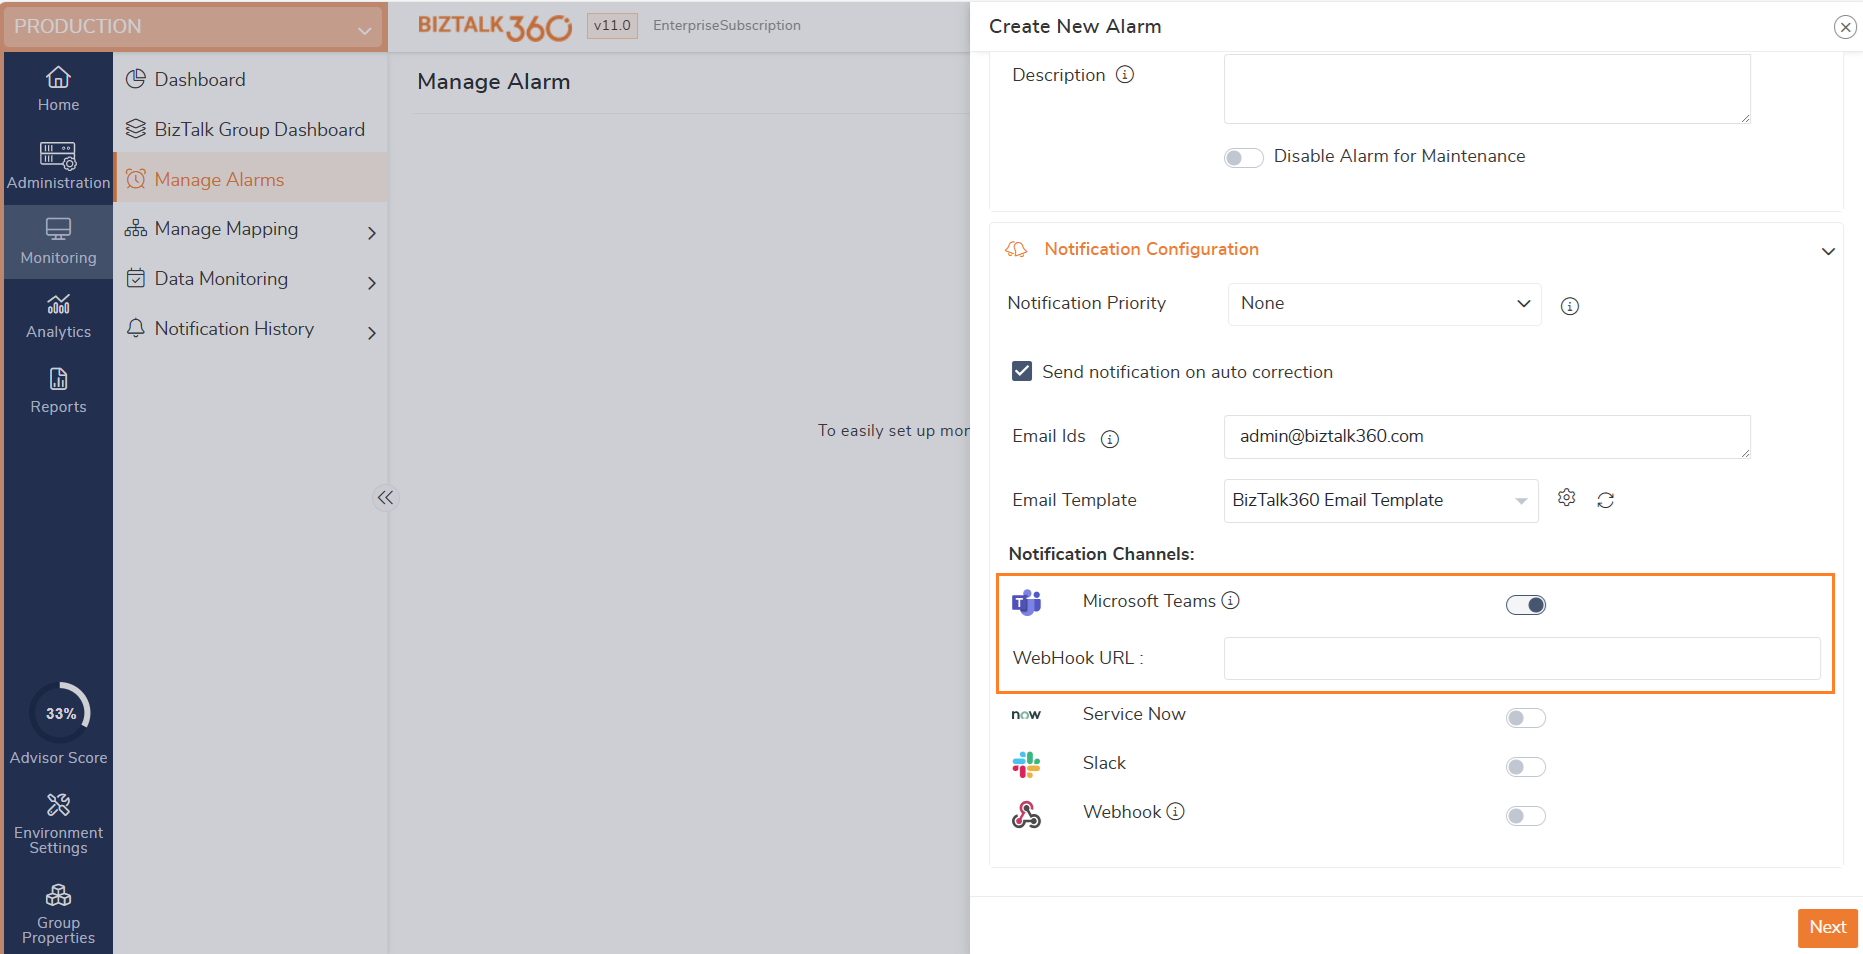
Upon successful mapping, user will receive alert notifications on Microsoft Teams whenever there is a threshold violation in the environment.
Size Limitation
Microsoft Teams alert has a maximum message size limit of 28 KB. When a larger number of mappings are configured in Monitoring, teams will automatically trim the content. In such cases, the notification will include only the artifact names and the status. Color indications and violation details will be excluded.
