BizTalk360 supports WebHook Notification Channel by which you can post the monitoring status and alert notifications to any REST API. Notifications are delivered via HTTP POST to a destination endpoint on your server, once the notifications are triggered via webhook as JSON response format, the user can use the notification details in their web services.
Setting up a WebHook notification in BizTalk360 is a two-step process:
- Configure the WebHook notification channel in BizTalk360 by entering the Web API, and other optional settings like the authorization credentials, payload, and default headers.
- Enabling WebHook Notification channel in BizTalk360 Alarm
Configuring WebHook Notification Channel
To configure the WebHook channel follow the below steps:
- Log in to the BizTalk360 application.
- Click the Settings icon from the menu option at the left of the page.
- Click Notifications from the left menu bar to expand.
- Click Notification Channels
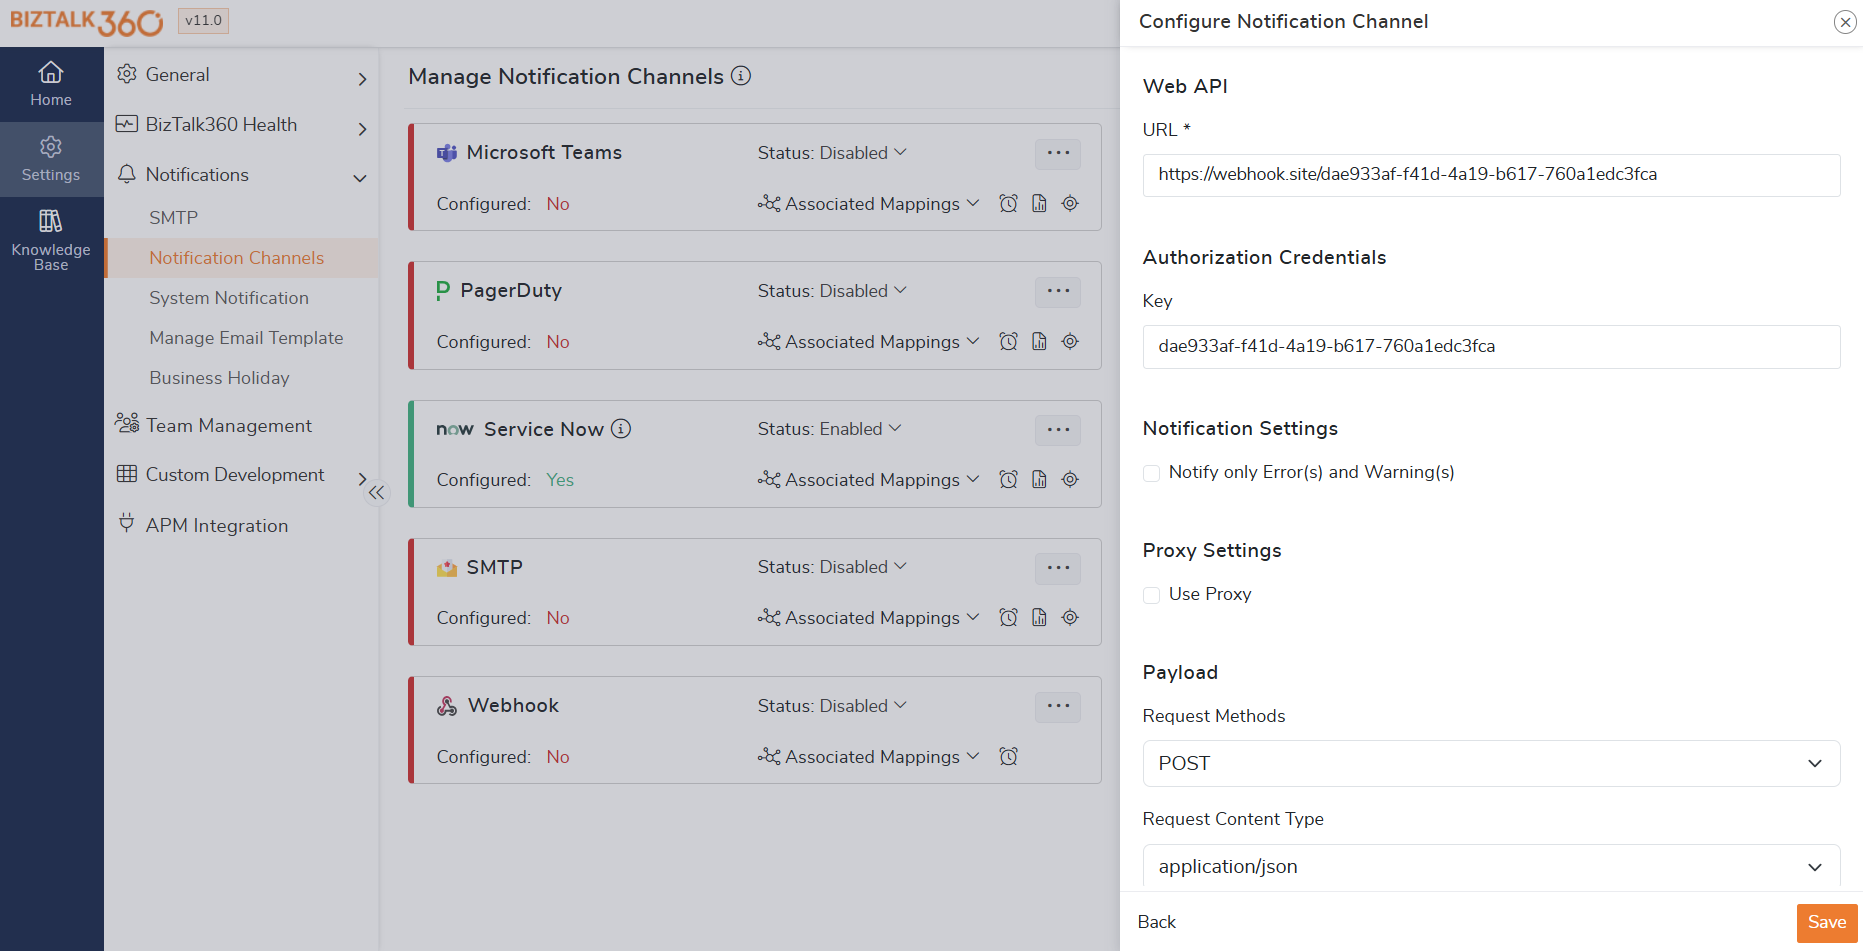
- Select B360.Notifier.Webhook. Click on the ellipse icon next to the Channel name and click Edit to open the configuration panel.
- Click Next in case if you do not want to modify the DLL to open the configuration page.
- Enter the API URL
- Notification Settings - Enable "Notify only Error(s) and Warning(s)" to notify only the error and warning state artifacts in the alert. Else the artifacts which are in a healthy state will also be listed in the alert.
- Enter the Optional Properties
- Key – API key that needs to be added in the Authorization header.
- Proxy Settings – Proxy server details if the BizTalk360 environment is behind a proxy.
- Request Methods – POST/PUT based on the API.
- Request Content-Type – XML/JSON based on the API.
- Default Headers – Any additional headers that need to add to the HTTP request header.
- Click Save to save the configurations.
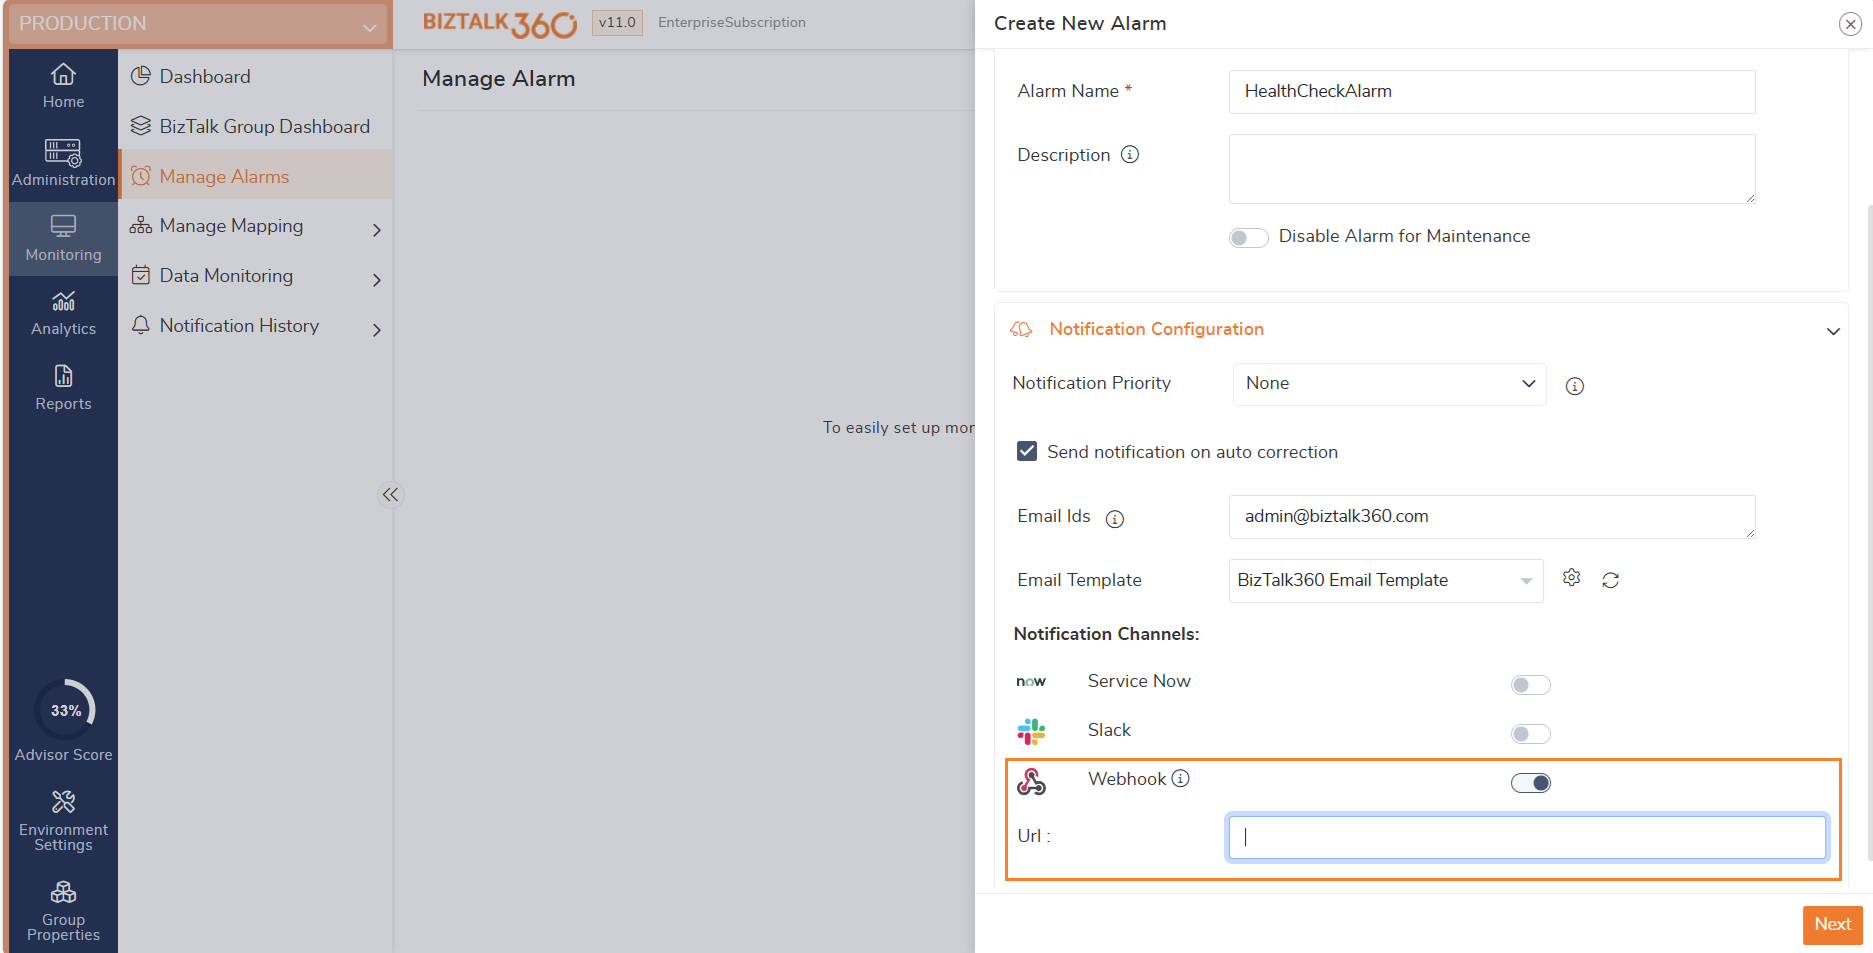
Enabling WebHook Notification Channel in BizTalk360 Alarm
The create alarm screen is flexible; you can simply create a regular alarm or a threshold alarm, or you can use the same alarm to monitor both regular and threshold conditions. To create an alarm in BizTalk360, you need to follow the steps below:
- Log in to the BizTalk360 application.
- Click the Monitoring tab in the Navigation panel on the left side of the screen.
- Click the Manage Alarms tab.
- Click New Alarm and select the alarm type from the drop-down. Enter a descriptive name for the Alarm, Email id (you can enter multiple email ids as comma-separated values), and Alarm Description.
- The user can enter multiple email ids as comma-separated values to receive separate alerts to all email IDs or enter semi-colon separated email ids to receive a single alert (email count) to all email ids in one go.
- Under the custom notification channels section, enable the Webhook Notification Channel.
- Click Validate to validate the configuration details of the notification channel.
- Click Next to continue with the configuration of the alarm and save it.