Microsoft suggests using Power Automate Workflows to post messages to Teams Channels. They also provide built-in templates to facilitate this. However, BizTalk360 recommends to make few changes in workflow templates to ensure seamless integration.
Why customization of the built-in workflow template is necessary?
When using the built-in workflow template, only the workflow owners can see whether the message was posted or not, and what is the reason for failure if it wasn’t posted. BizTalk360 will always receive a general acknowledgement stating that the request to post a message was received, but it does not provide details on whether the message was successfully posted or failed due to an error.
To correctly determine the status of message posting and take appropriate action, we recommend customizing the template as outlined in the following section.
Create Workflow in Microsoft Teams
Follow these steps to create a flow from the Microsoft Teams:
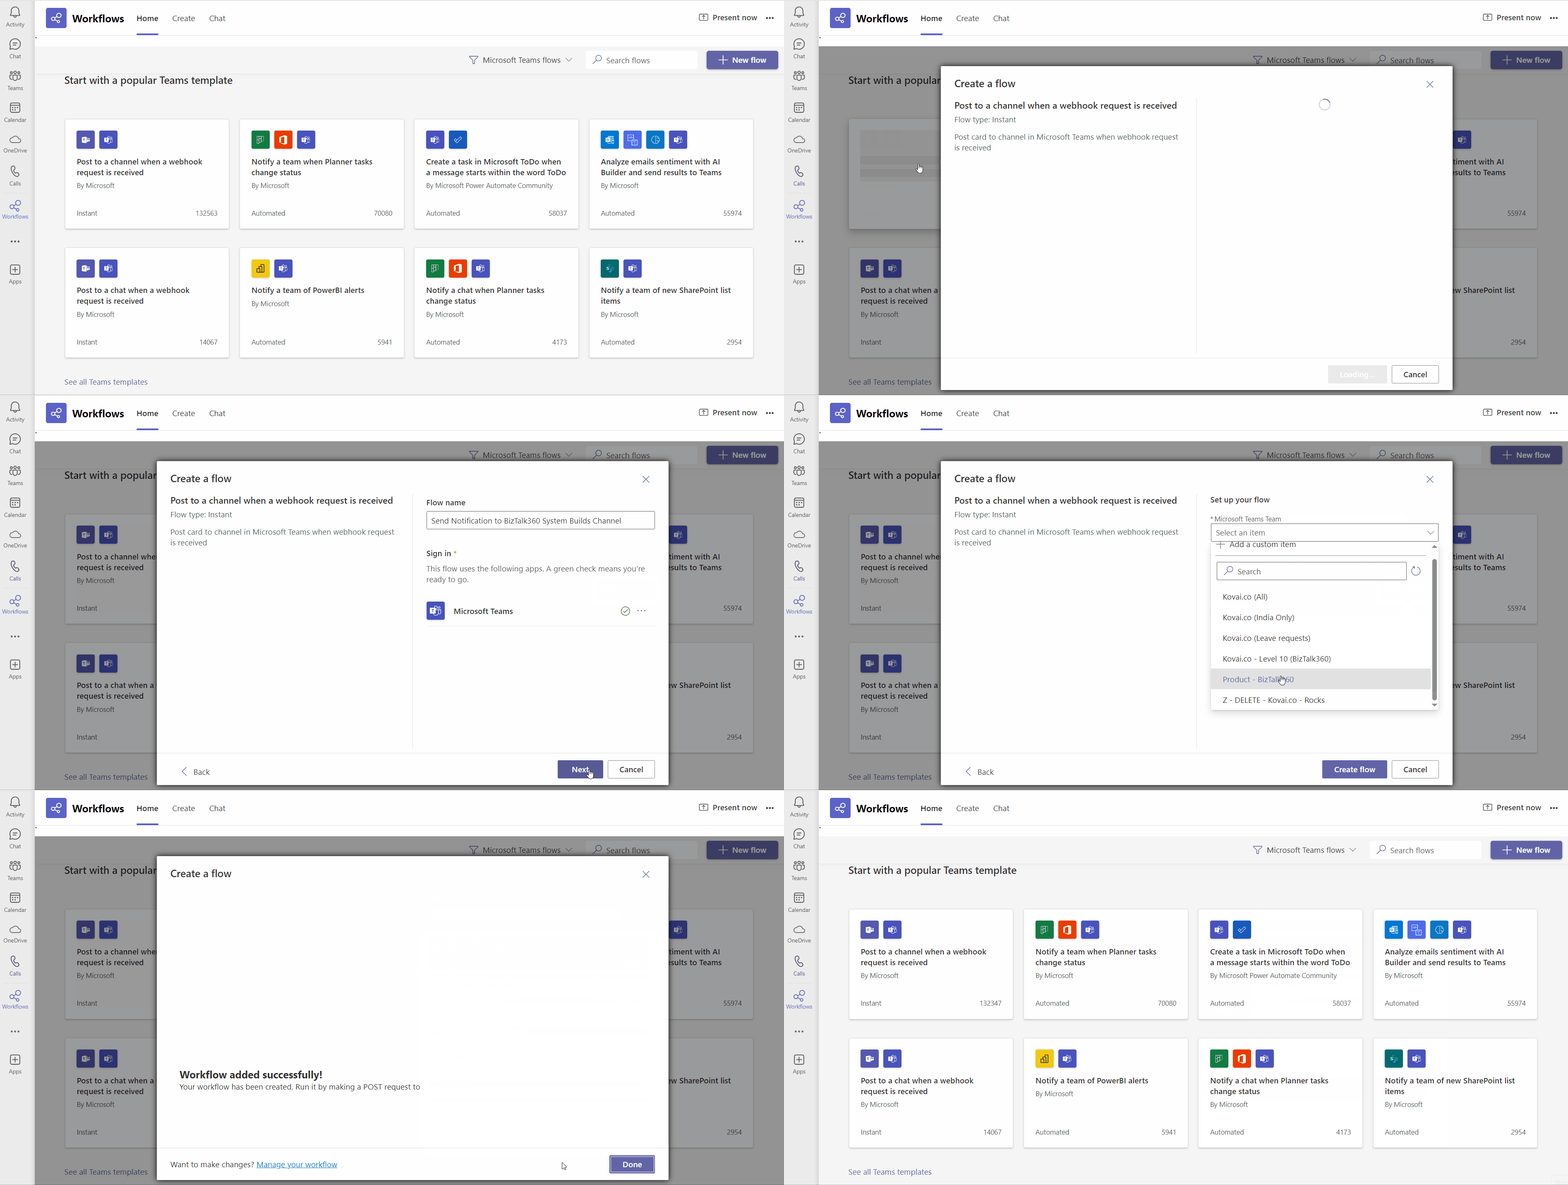
Log in to Microsoft Teams.
Click on View more apps (...) and search for the Workflows app.
Click Add to install the Workflows.

On the Workflows → Home page, you’ll see a list of templates relevant to Microsoft Teams, Click on Post to a channel when a webhook request is received workflow.
Provide a name for the workflow and verify the sign-in option, then select Next.
On the next page, you’ll be able to choose the Team and Channel to which the notification will be posted. After selecting the appropriate options, click Create flow.
Once the workflow is created, a new dialog will appear showing the URL to be used for sending a message.

Customize the flow:
At the top of the Home page, all the saved workflows are displayed. Click on the workflow you just created and click the Edit option at the top left corner.

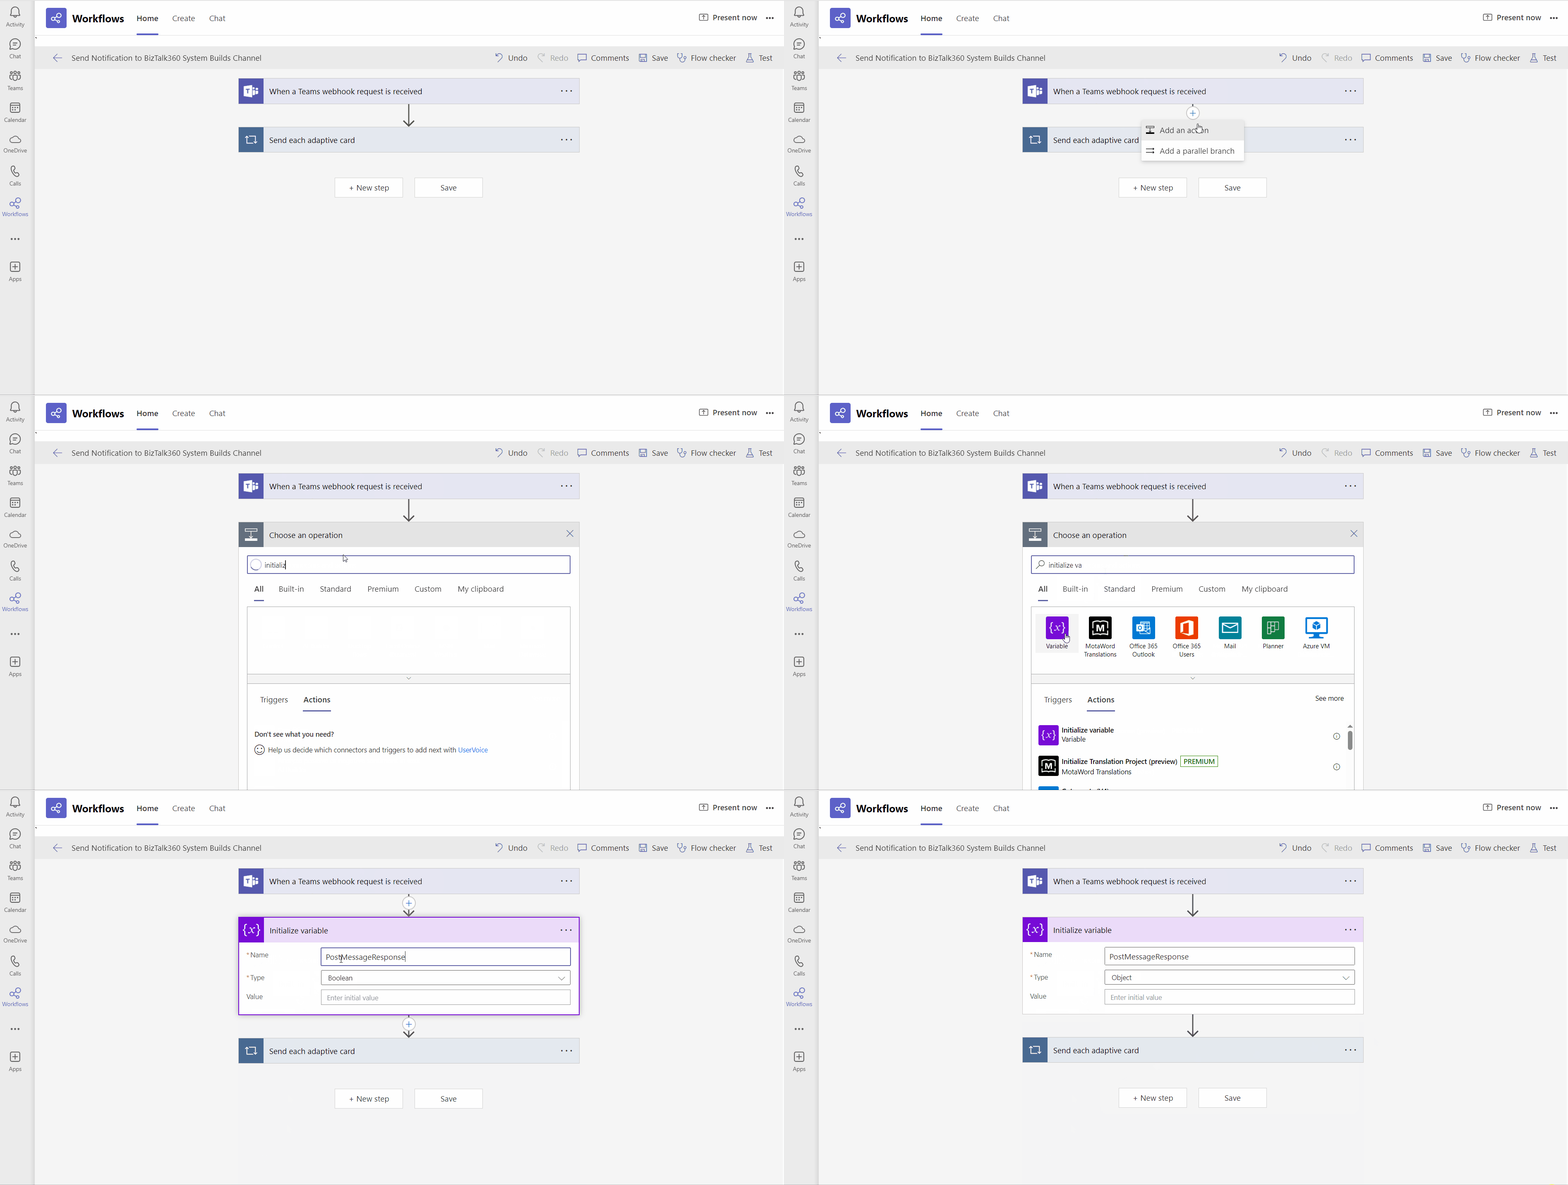
In the edit screen, two steps named "When a Teams webhook request is received" and "Send each adaptive card" are shown by default.
Step 1: Initialize Variable
Click the Plus button between the two steps and select Add an action.
In the search bar, type Initialize variable and click the appropriate action.
Provide a Name for the variable, e.g.,
PostMessageResponseSet the Type as Object.
Leave the Value field empty.

Step 2: Set Variable
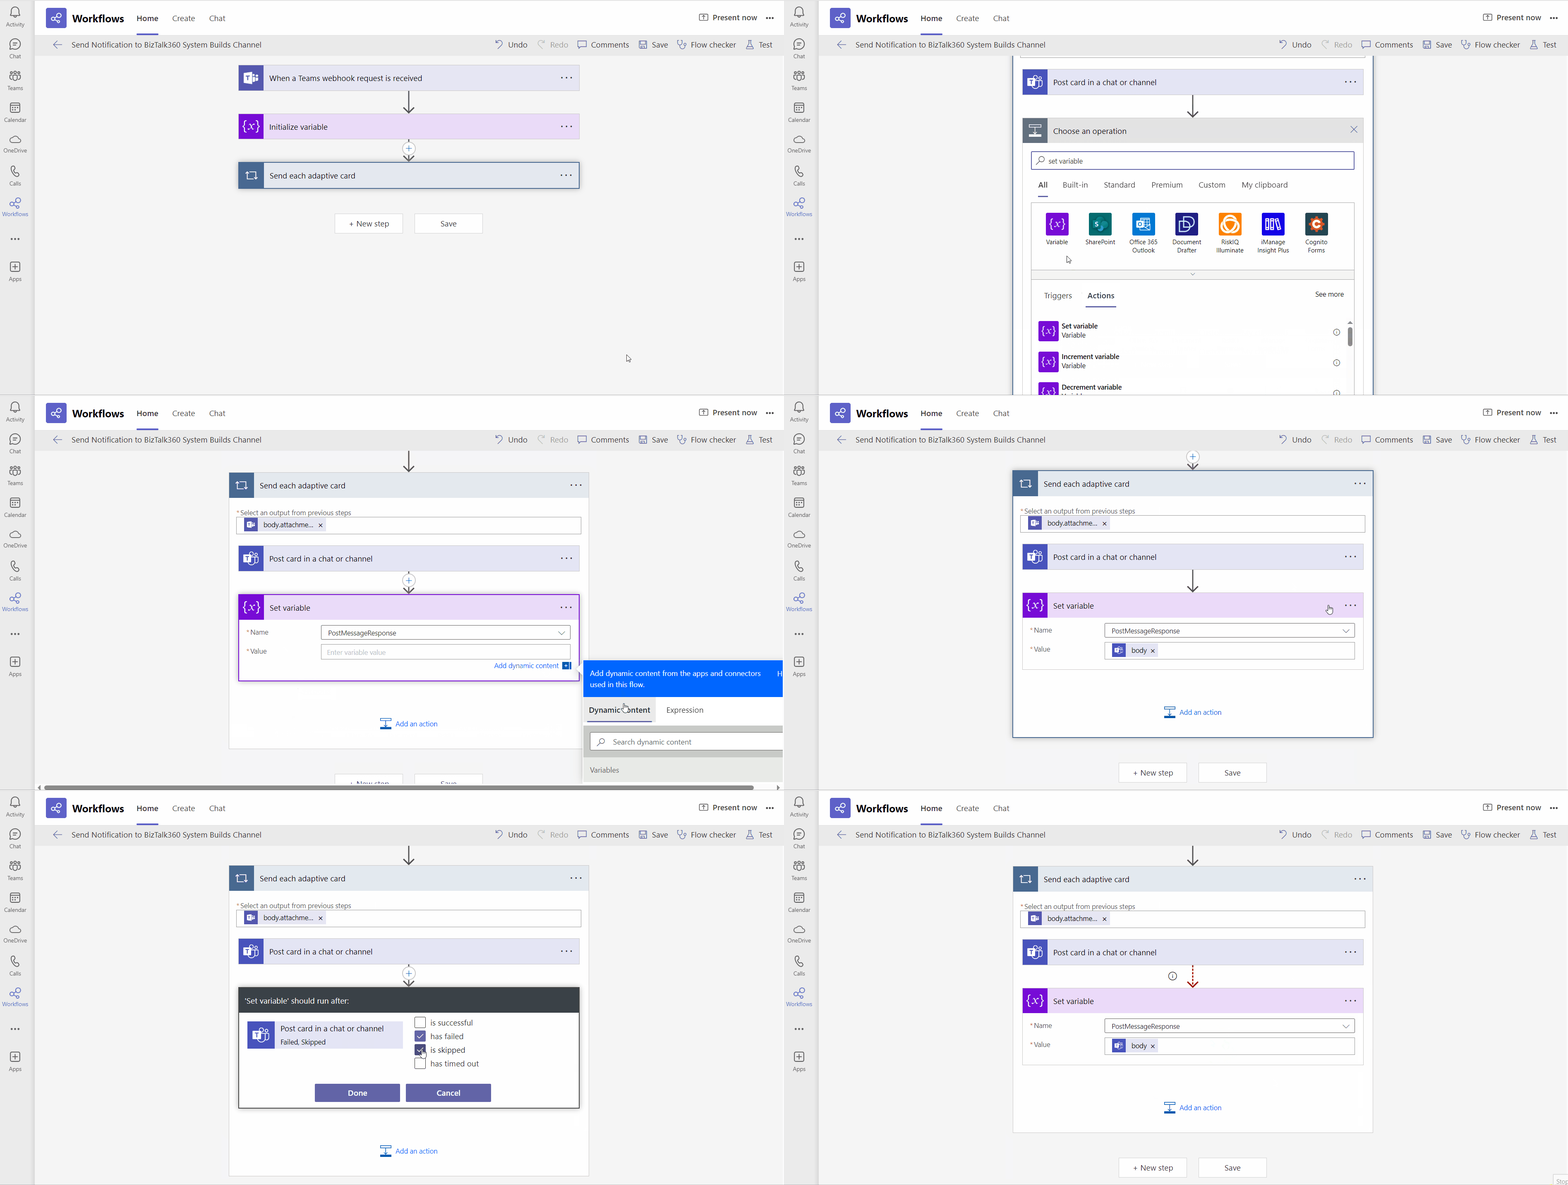
Click on the Send each adaptive card step.
Click Add an action within that step.
Search for Set variable and select the appropriate action.
In the Name field, choose the variable you previously created, i.e.,
PostMessageResponseClick on the Value field and then click Add dynamic content.
In the Dynamic Content popup, select the body option under the Post card in a chat or channel section.
After creating the action, click on the three dots in the upper-right corner of the Set Variable action.
Select Configure run after.
Uncheck the
is successfuloption and select the remaining three options. Then click Done.

Step 3: Return Response
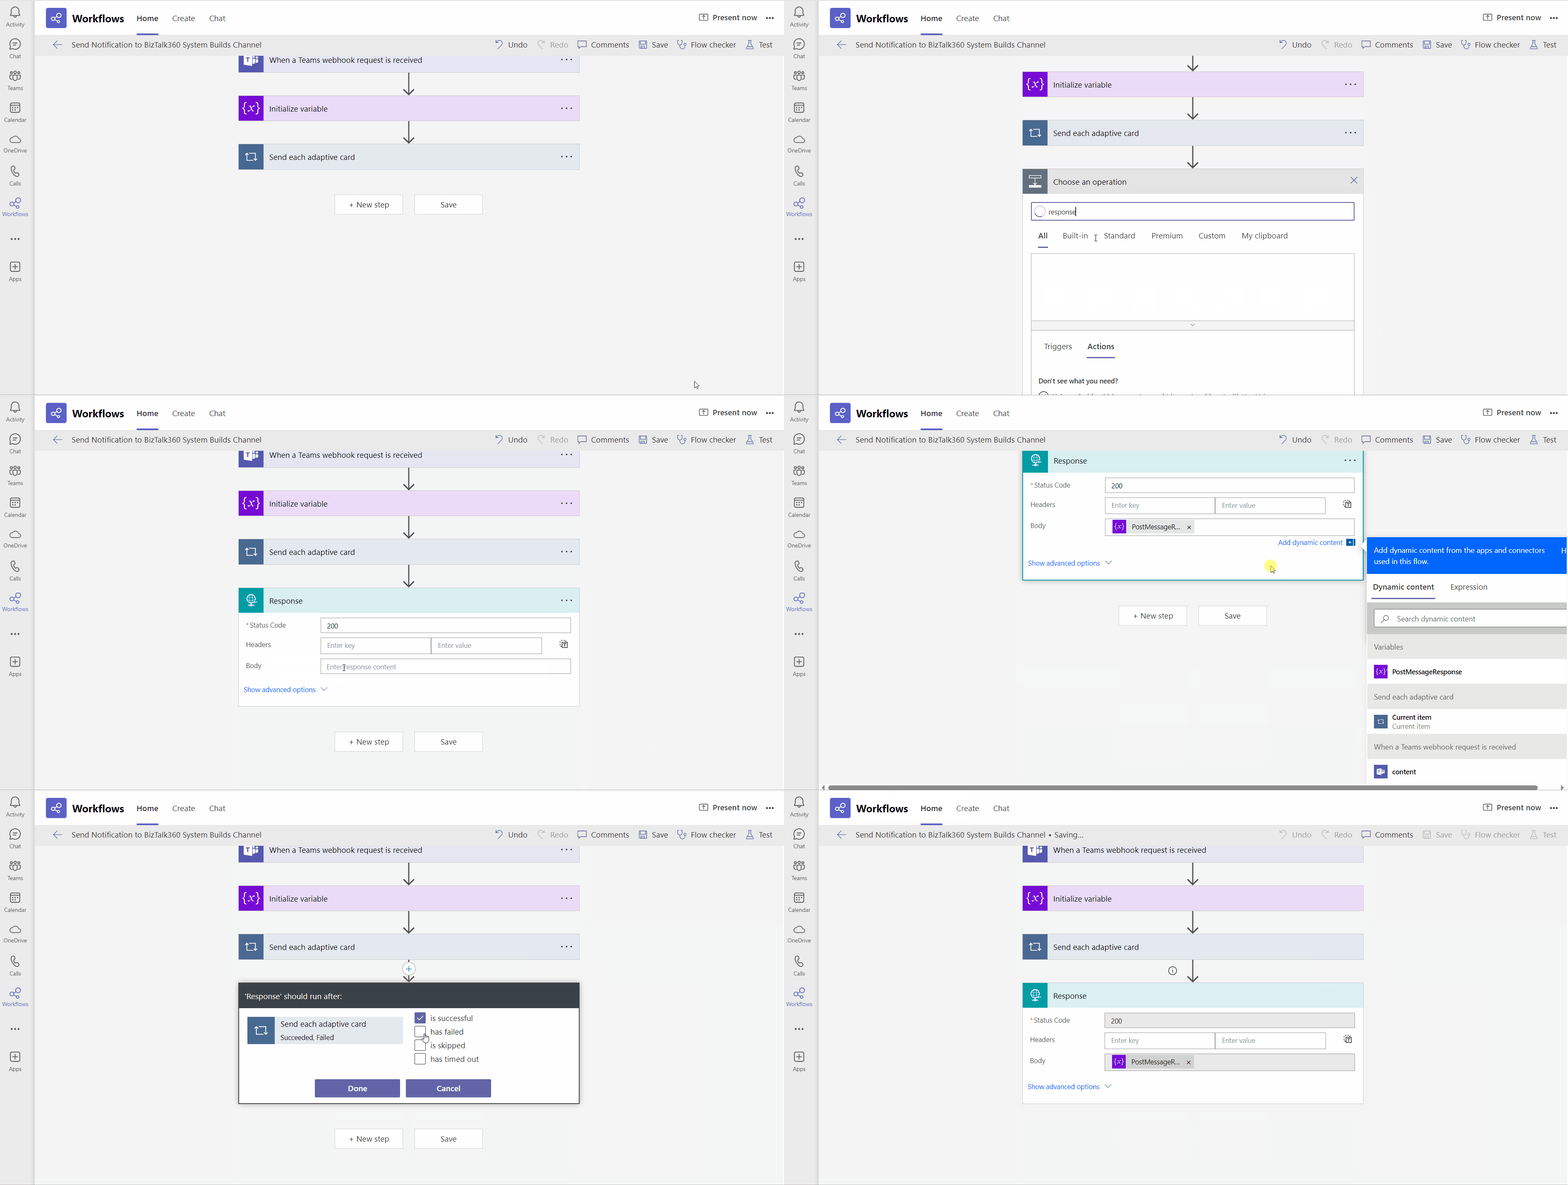
After the Send each adaptive card step, click New Step
Search for Response and select the appropriate action.
In the Body field, click Add dynamic content.
In the Dynamic Content popup, select the previously created variable,
PostMessageResponse.Click on the three dots in the upper-right corner of the Response step.
Select Configure run after.
Check all four options:
is successful,has failed,is skipped, andhas timed out. Click Done.Save the workflow.
Note: The Response action is part of the Premium Subscription.

Now the workflow is set up to post messages and return the correct response based on the status of the post.
If you haven't already copied the Webhook URL, click on the first step in the workflow (When a Teams webhook request is received) and copy the HTTP POST URL.

Provide this URL in the BizTalk360 Teams Notification Channel and configure it for Alarms, Automated Tasks, or Reports to receive timely notifications.

Important Notes:
Microsoft Teams Channels accept messages only up to 28KB. If the message exceeds this limit, BizTalk360 will send a fallback message by trimming some information and keeping only the essential details.
Workflows cannot post messages to Private Channels.
Messages can't be posted if the Workflow is turned off in Teams.