One of the most common problems that administration teams encounter in a multi-server (high-availability) BizTalk environment is while monitoring/diagnosing the problems. If an error or failure happens on different servers, the administration team has to manually log in to each server to check the root cause of the problem. This is a time-consuming process and it poses severe security risks since team members will have full access permissions to log in to the server and perform any operations to fix the issues.
In an effort to address this issue, BizTalk360 provides the functionality of a centralized event viewer (called Advanced Event Viewer) that is capable of aggregating information from different sources and displaying it in a single interface. The Advanced Event Viewer (AEV) is an extended version of the standard Windows Event Viewer. BizTalk360 AEV collects event information from different servers in the BizTalk Server Group and displays them in a single place. In addition, BizTalk360 AEV offers the rich query builder option through which users can create, store, and reuse queries and provide a consistent interface for all data sources in a BizTalk environment.
Generating Events List in BizTalk360
Once the Advanced Event Viewer is configured in the Environment settings screen, you can query the events from the UI. Depending on the settings, the sub-service of the BizTalk360 monitoring service polls the event logs for the log information. If any matching event log is found, it will be written into the BizTalk360 database. When you execute a query, the information will be fetched from the BizTalk360 database and displayed in the UI.
When accessing the Advanced Event Viewer page for the first time, you may see a warning message as follows:
To retrieve the list of events in BizTalk360:
- Log in to the BizTalk360 application
- Click the Administration tab in the Environmental panel
- Click the expand button against Advanced services and select the Advanced Event Viewer link
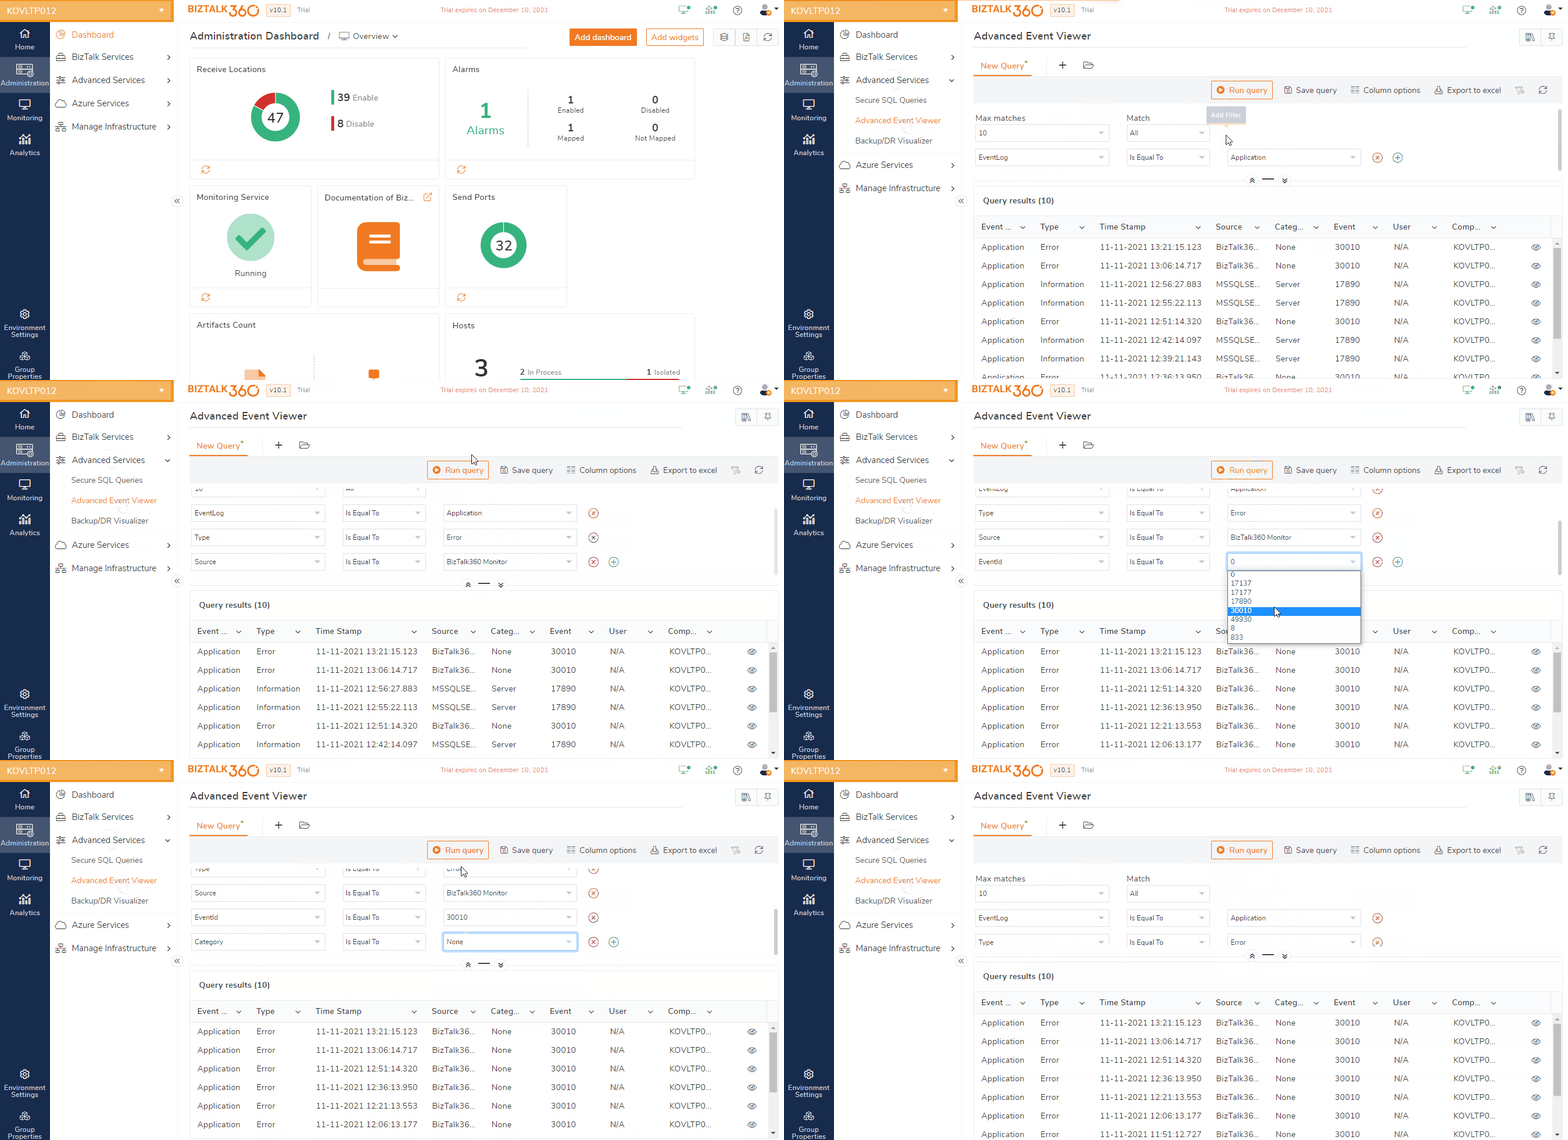
- In the Advanced Event Viewer (Queries) screen, under the Build Query Expression:
**Maximum Records** - Select the number of records to be fetched from the database. Ex. 10, 25, 50, 100- Match - This option needs to be selected if any additional filter options are selected. By default, the value of this field is "All of the following"
- Add a filter - To filter the results based on different parameters such as Event Log, Type, Source, Event, Category, User, Computer, Timestamp, and Message select the '+' option. Once the filter criteria are selected, you will automatically see the values for the filter getting listed in the drop-down. Ex. Event Log, Is Equal To, Application. When an event log is selected from the drop-down, the value Application & other fault codes will automatically be listed in the drop-down. The user can select the required value
- The operator in most cases is 'Is Equal To'. But in the case of the category 'DateTime', the operator will be 'On or Before' or 'On or Later'
- X- To delete the filter criteria
- Once a filter item is chosen from the drop-down and while adding a new filter, the previously selected item will not be visible in the drop-down
- Click Run Query to get the events list
- The Query Results section displays the list of events
- In the Query Results section, click the Properties icon (represented by an ellipsis button ) to view the event properties

Query Operations - Save, Open, and Delete
BizTalk360 provides the options to save and delete the query expressions as provided by the BizTalk Admin Console. Users can save queries for easy access in the future.
- Log in to the BizTalk360 application
- Click the Administration tab in the Environmental panel
- Click the expand button against the Advanced services tab and select the Advanced Event Viewer link
- Select the appropriate filter criteria (if any), and click Run Query
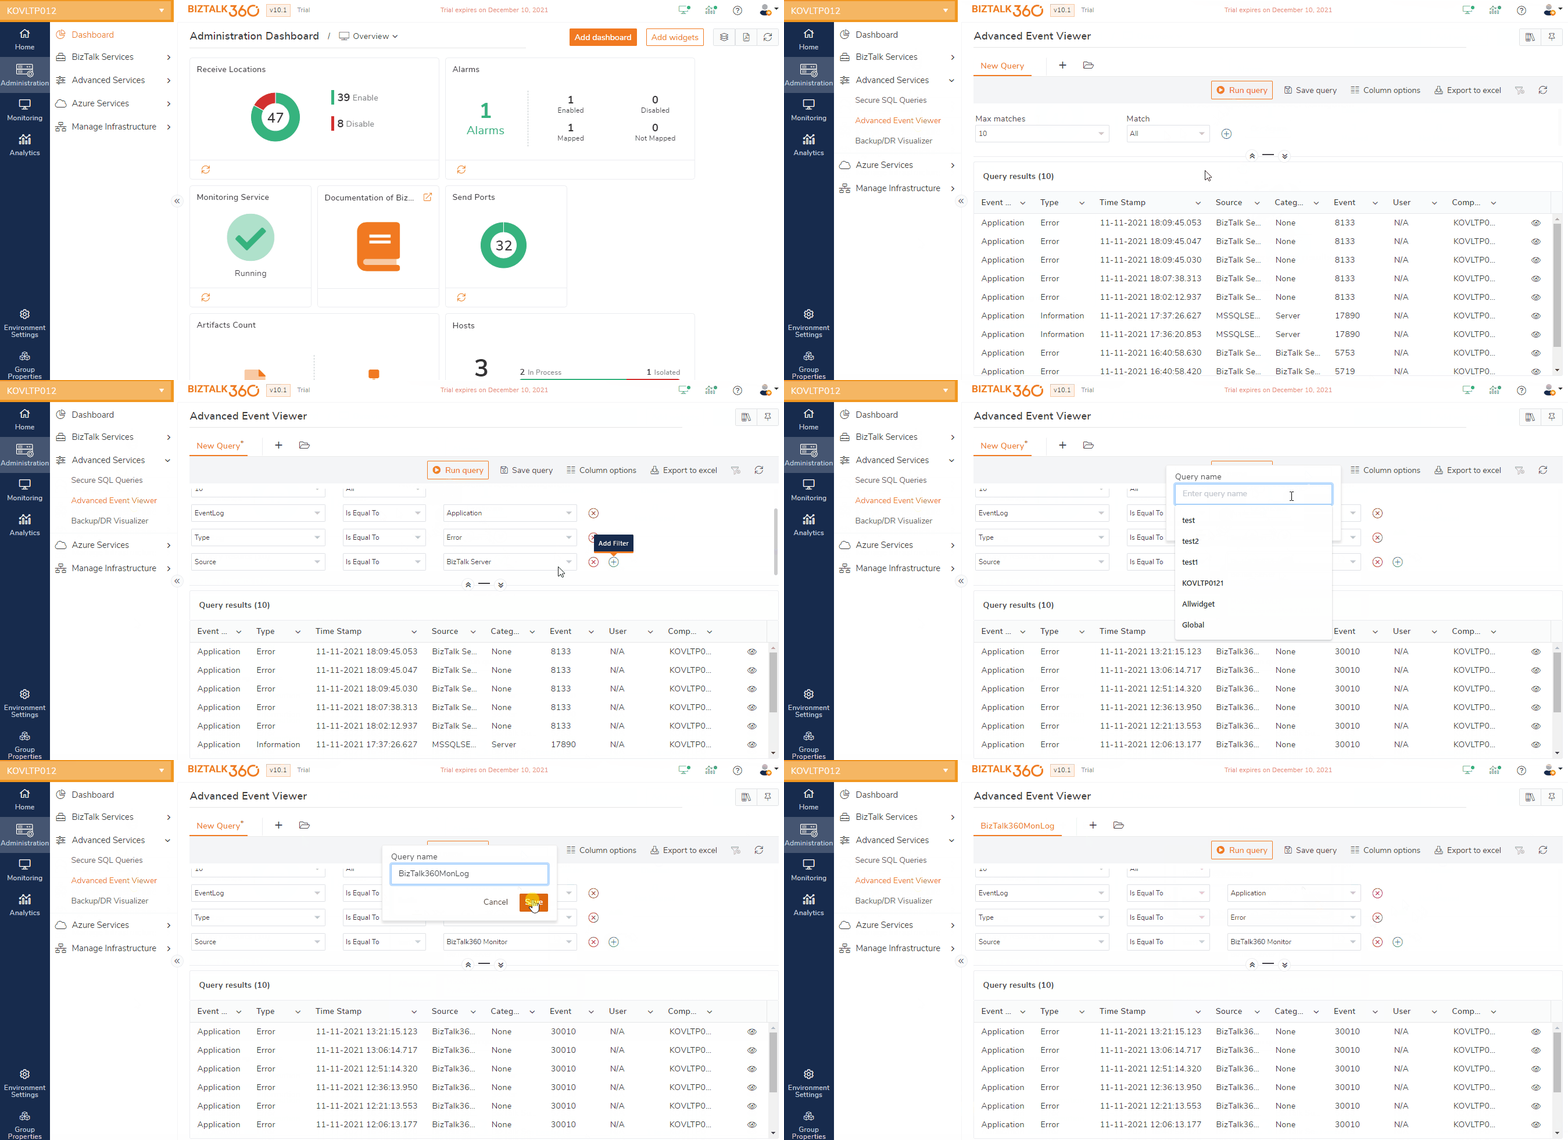
- Once the query results are available, click the Save Query icon (floppy disk icon) to save the query
- Enter the name to save the query expression
- Click Save to save the query expression. Once the query is saved, the tab name will be renamed to the name of the query.
Click the video, the example shows you to execute a query with required filters and save the query as "Application error".
To save an already saved query expression with a new name, follow the steps as shown below:
- Click the Open Saved Query icon (folder icon). Select the query name from the list to open the saved query
- Click the Save Query As icon (files icon), enter the new name to save the query expression
- Click Save to save the query expression

The example shows you how to save an already saved query expression (Application Error) with a new name (Application_Errors).
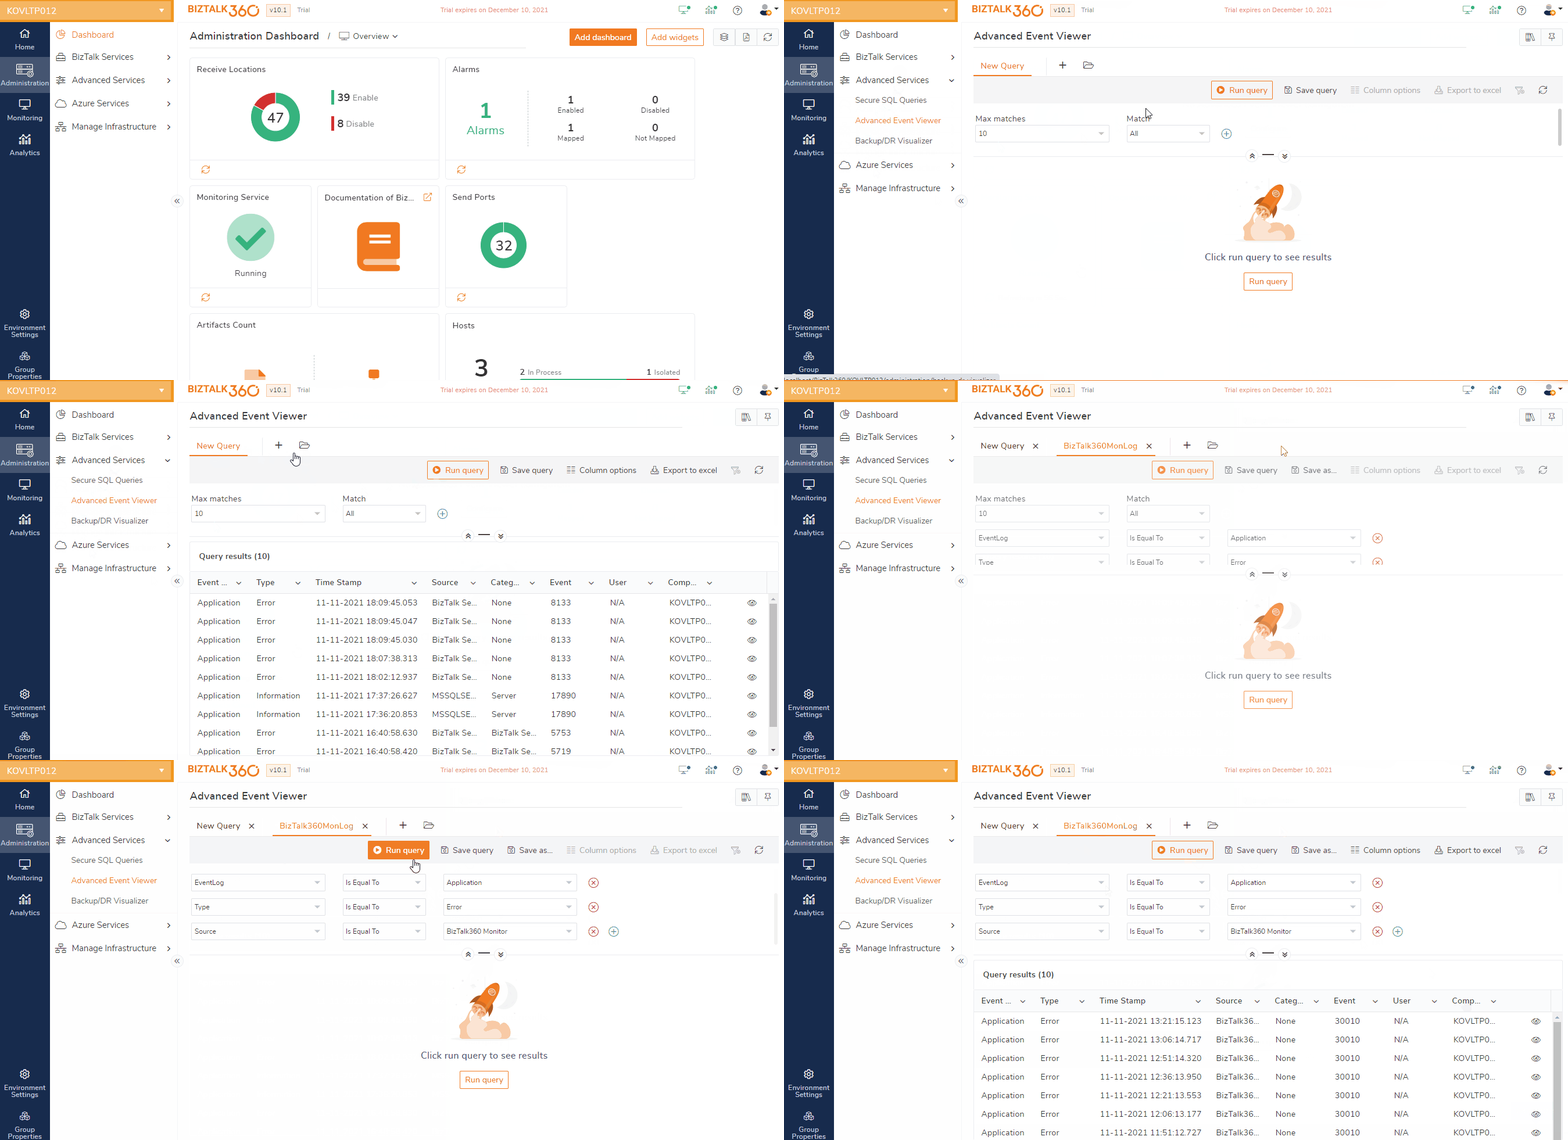
To open the saved query expression:
- Click the Open Saved Query icon (folder icon). Select the query name from the list to open the saved query
- The tab name will be renamed to the name of the query and the saved filter criteria will be displayed under the Build Query Expression section
- Click Run Query to generate the query results

The example shows you how to open an existing query and execute it.
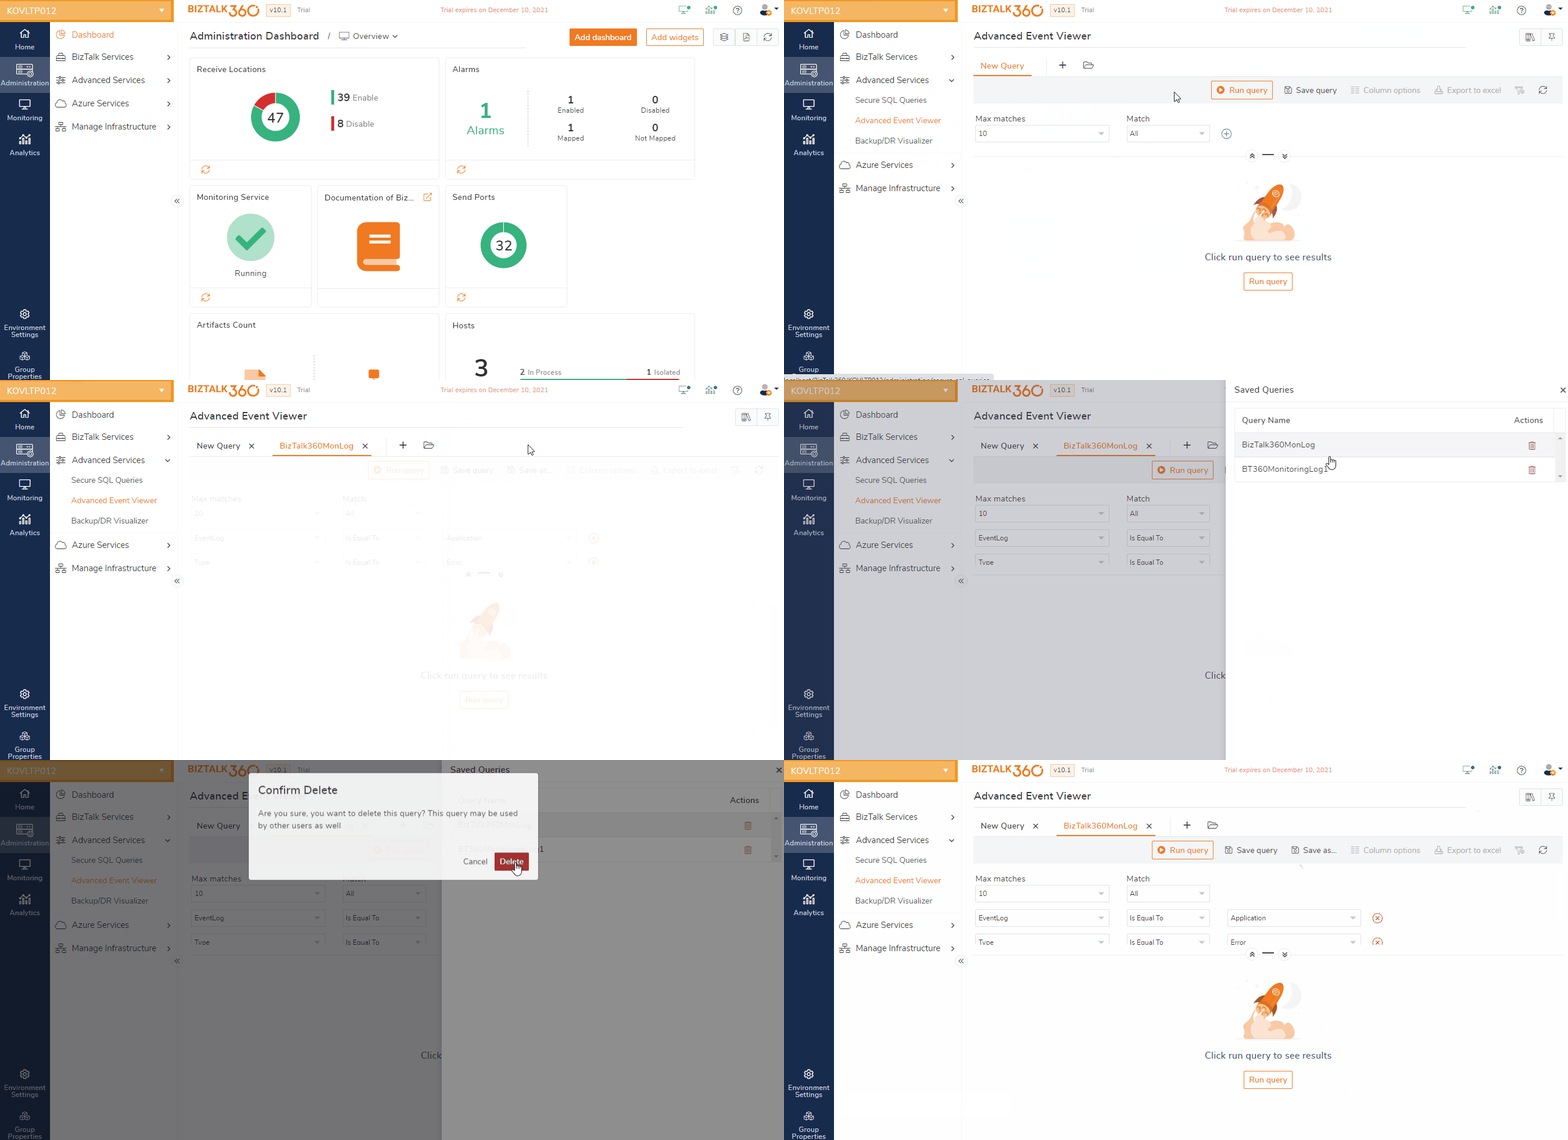
To delete the saved query expression, follow the steps as shown below:
- Click the Open Saved Query icon (folder icon). Select the query name from the list to delete the saved query
- Click the Delete Queries icon (trash bin icon)
- Select the delete icon (trash bin icon) against the query name that has to be deleted
- Click the Delete button on the popup page and then hit 'X' to close the delete query page

The example shows you to delete an existing query.
Filter Implementation for Grids
A Filter capability is implemented for the grid columns to do a better search from the grid columns. A user can filter the data from the respective rows according to their needs.
The following types of filters have been implemented in the grid columns of the Advanced Event Viewer:
- Date Time Filter
- Text Filter
Date Time Filter
The Date Time filter is added to filter grid data based on the given selected date and time. This filter has below options for easy search:
- Is equal to
- Is not equal to
- Is after or equal to
- Is after
- Is before or equal to
- Is before
- Is null
- Is not null
Text Filter
This is the most commonly used filter. Using this filter, a user can perform a text-based search. The text filter has the following options:
- Is equal to
- Is not equal to
- Starts with
- Ends with
- Contains
- Does not contains
- Is null
- Is not null
- Is empty
- Is not empty