Ensuring the optimal performance of your SQL server involves maintaining the health of its physical infrastructure, including disks, CPU, memory, and other components. To monitor the SQL Server, you need to add SQL Servers to the system. Similarly, for monitoring SQL jobs, you need to add SQL instances to the system.
Adding SQL servers
BizTalk360 allows you to add SQL Servers to centrally manage and monitor server disks, system resources, event logs, and NT Services running on the server.
To add a SQL Server to the BizTalk360 portal, follow the steps below.
Log in to BizTalk360 and select the required environment.
Navigate to Environment Settings → General → SQL Server and click Add SQL Server.
Choose the SQL Server type you want to add:
Standalone
Clustered
Always On Availability Group
Enter the required server details and click Test Server Availability to verify whether the configured server is reachable and running.
Click Add to register the SQL Server. BizTalk360 validates connectivity using Ping or Telnet.
Once added successfully, you can manage and monitor the SQL Server resources from BizTalk360, provided the server is reachable. Server availability is visually indicated using green (reachable) and red (unreachable) status indicators.
Remove SQL Server : If a SQL Server is removed from BizTalk360, all associated monitoring configurations for that server are permanently deleted.
Note : Database Mirroring
If Database Mirroring is used the connection string needs to be updated as :"Server=PRIMARY_INSTANCE;Failover Partner=MIRROR_INSTANCE;Database=BizTalk360;Integrated Security=True;"
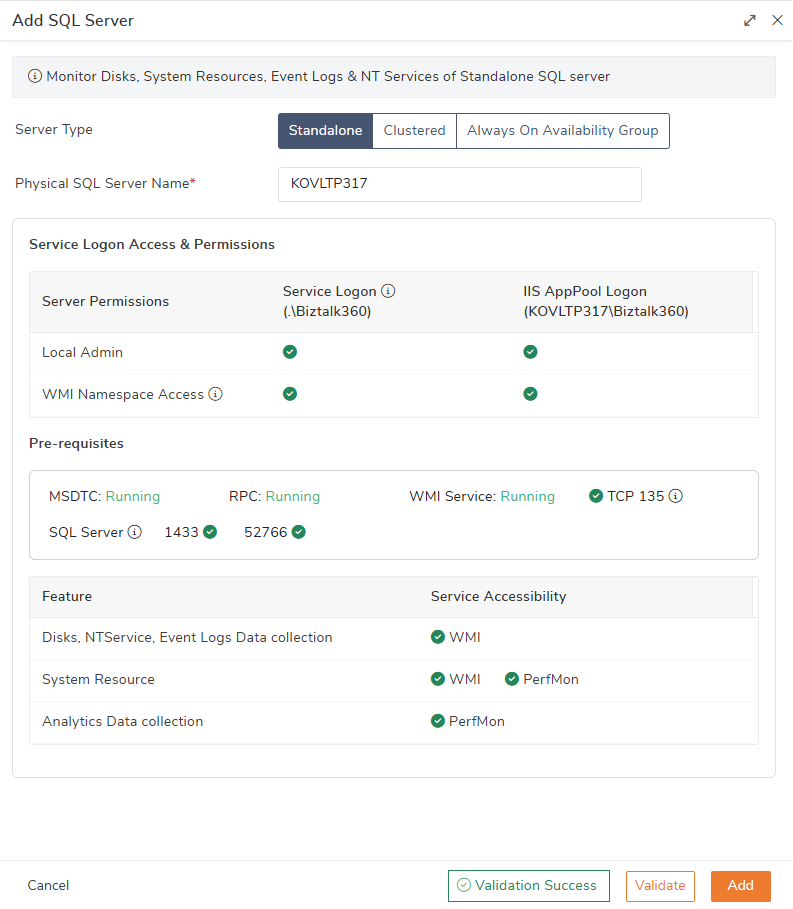
Standalone Server Configuration
To configure a standalone SQL Server for monitoring, select Standalone as the server type and enter the physical server name.
Click Validate to verify server connectivity. If the server is reachable, BizTalk360 automatically displays the permission-related details required for monitoring.
Once the server is added successfully, server disks, system resources, event logs, and NT Services associated with the SQL Server become available for monitoring.
If validation fails or any required permissions are missing, monitoring may not function as expected. Ensure all issues are resolved promptly to enable proper SQL Server monitoring.
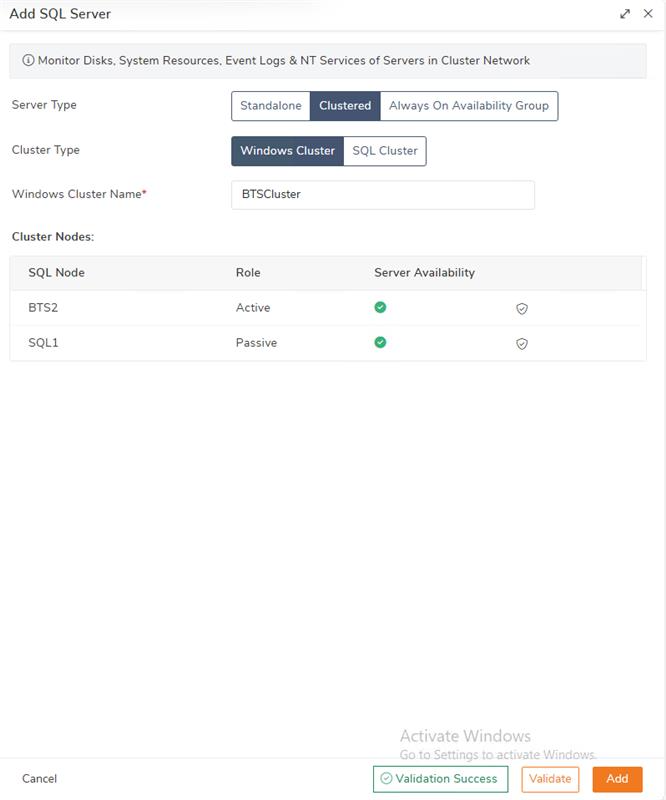
Clustered Server Configuration
Windows Cluster
Select Clustered as the server type and enter the Windows Cluster name.
It validates the cluster and automatically discovers all associated nodes, and the system identifies and displays both active and passive cluster nodes.
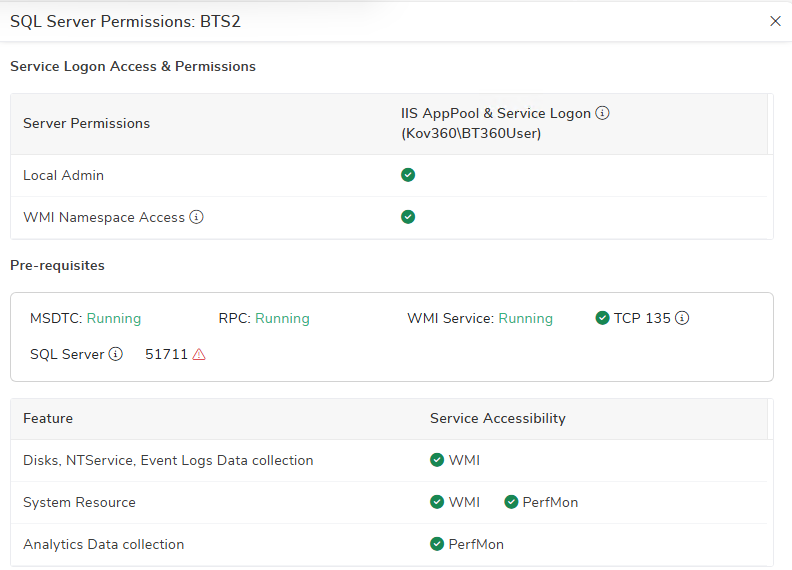
Once after validating, users can view permission details for each cluster node by clicking the server permission icon.
After adding the cluster, BizTalk360 highlights the active node in green and continuously monitors the active node in the cluster.
When a failover occurs, monitoring automatically switches to the new active node, so no manual intervention is required. This ensures uninterrupted monitoring and always shows the current cluster status.
If any required permission is missing or validation fails, monitoring may not function correctly. Resolve the issue immediately to ensure proper SQL Server monitoring
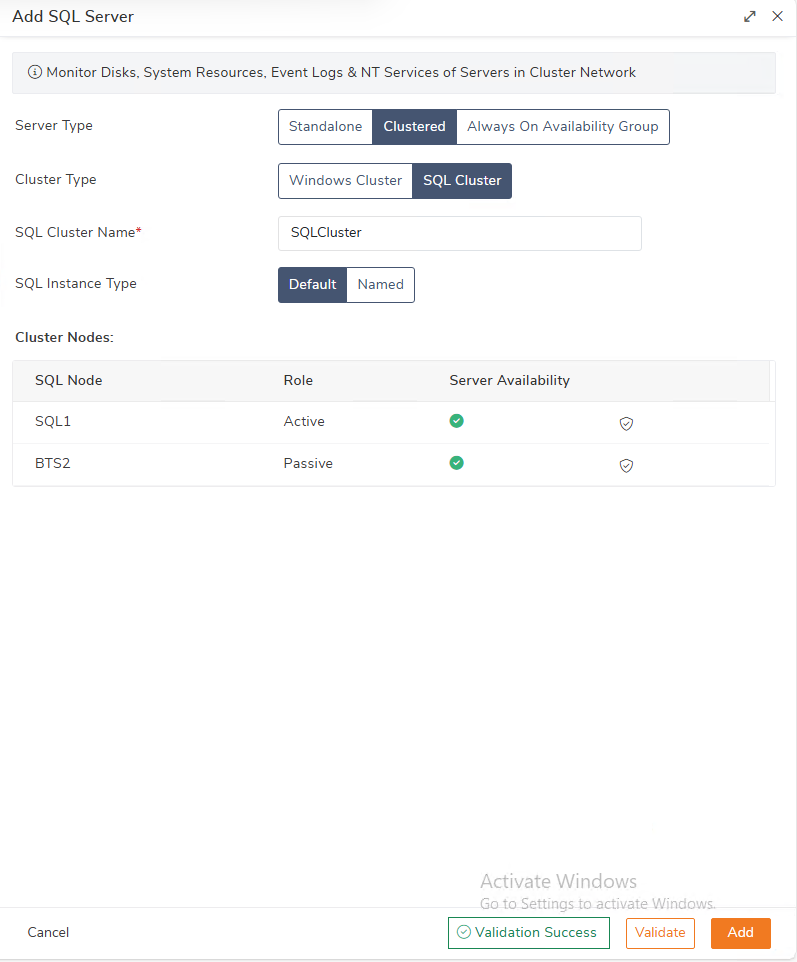
SQL Cluster
Select the clustered SQL Server type and enter the SQL Server Network Name instead of the physical SQL Server name.
Select the instance type as Default or Named.
If you select a Named instance, provide the instance name.
After the clustered SQL Server is validated, all associated cluster nodes are automatically listed.
By clicking the server permission icon, the user can view the permission details for each cluster node. If any required permission is missing or validation fails, monitoring may not function correctly. Resolve the issue immediately to ensure proper SQL Server monitoring.
When a failover occurs, it automatically switches to the new active node and ensures smooth monitoring. So no manual intervention is required.
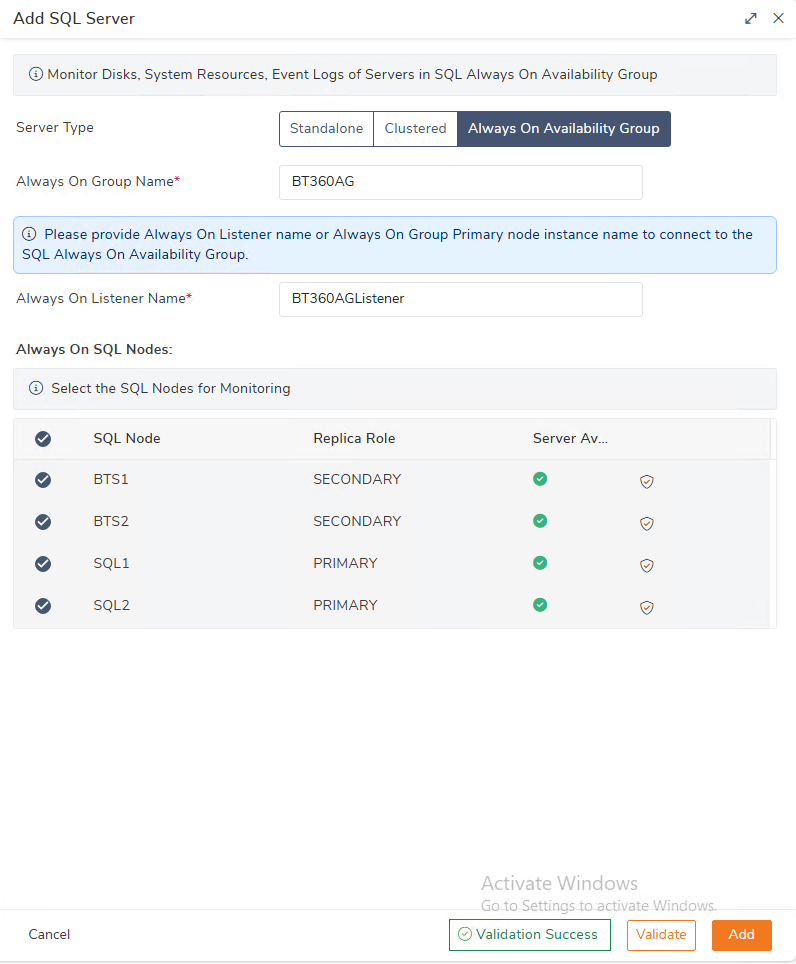
Always On Availability Group
Select Always On Availability Group as the server type.
Enter the Availability Group name and the Always On Listener name.
Once after validating, the system automatically lists all associated nodes, and the Primary and Secondary nodes are clearly identified for the configured server.
Click the Server Permission icon to view permission details for each node and verify monitoring works smoothly.
If any required permission is missing or validation fails, monitoring may not function correctly. Resolve the issue immediately to ensure proper SQL Server monitoring
Always On Availability Group - In order for BizTalk360 to fetch SQL Always On Availability Group nodes, the VIEW STATE permission is required on the master database for the BizTalk360 service account.
By default, most SQL users will already have this access. However, in environments with restricted security configurations, the VIEW STATE permission might be explicitly revoked or not granted.
To grant the required permission, execute the following SQL script on the master database:
Grant query to provide permission:
use master
GRANT VIEW SERVER STATE TO [KOVLTP366\BizTalk360] -- Grant VIEW SERVER STATE access for the Login
GRANT VIEW ANY DEFINITION TO [KOVLTP366\BizTalk360] -- Grant VIEW ANY DEFINITION access for the Login
Query to verify permission:
use master
SELECT HAS_PERMS_BY_NAME(null, null, 'VIEW SERVER STATE') AS VIEWSERVERSTATEPERMISSION
SELECT HAS_PERMS_BY_NAME(null, null, 'VIEW ANY DEFINITION') AS VIEWANYDEFINITIONPERMISSION
Server Permissions
The following permissions are required to manage and monitor SQL Server resources. A green check mark indicates that the required permissions are configured correctly. If a warning or error is displayed, it means one or more permissions or required services are missing or unavailable and must be resolved to ensure successful monitoring.
Prerequisites to Check - Confirm the following services and ports are available and running on the SQL Server:
MSDTC service
RPC service
WMI Service
TCP port 135
Ensure the SQL Server port status is running on the server.
Steps to add the permission for the service account
Add the Service Account to Local Groups - Ensure the BizTalk360 service account is added to the following local groups on the remote SQL Server:
Distributed COM Users
Performance Log Users
Performance Monitor Users
Configuring WMI Namespace Permissions
Open WMI Management, in the WMI Control window, right-click WMI Control (Local) → select Properties.
Go to the Security tab → expand Root → select CIMV2 → click Security.
Click Add, select the BizTalk360 service account, and grant the following permissions:
Enable Account
Remote Enable
To ensure seamless connectivity, verify both WMI and PerfMon can successfully connect to the remote machine.
Permissions Required by Feature
WMI access is required for monitoring:
Disks
NT Services
Event Logs
WMI and Performance Counters (PerfMon) access is required for:
System Resource Monitoring
Performance Counters (PerfMon) access is required for:
Analytics data collection
You can still add the SQL Servers that are temporarily unavailable, but you will see some discrepancies in the monitoring dashboard(you cannot see the graph properly). However, it will work seamlessly once the server is reachable.
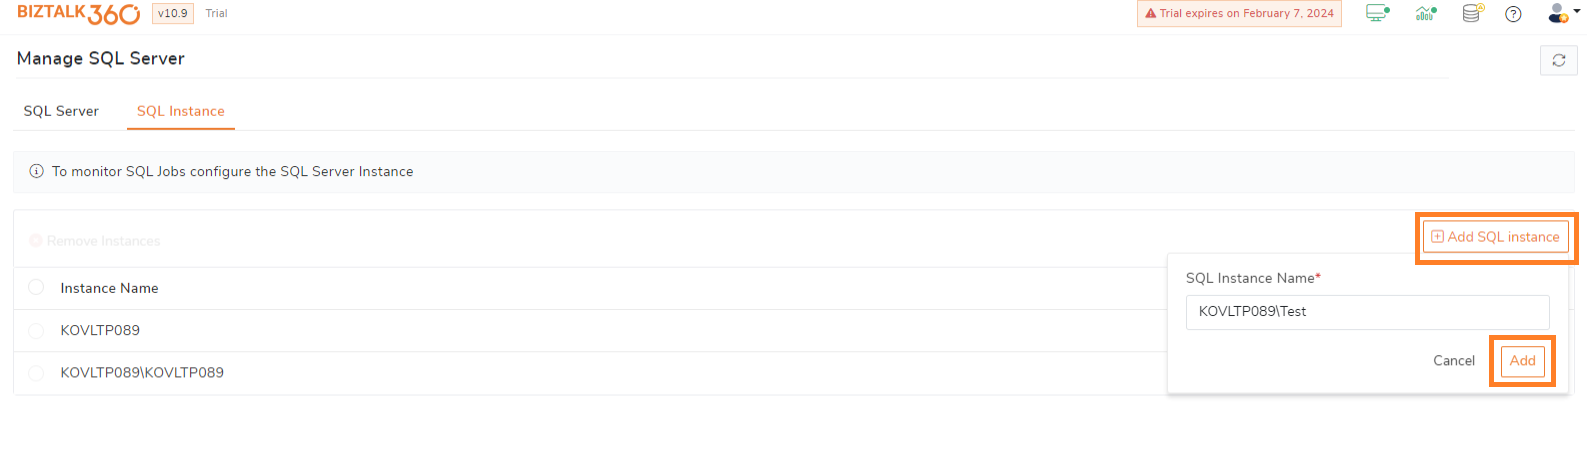
Adding SQL instances:
The SQL instances must be added to monitor and administrate the SQL jobs. By default, all the instances associated with the BizTalk environment will be added automatically in case if you want to add additional instances, follow below steps.
Log in to BizTalk360 and Select the Particular environment.
Navigate to Environment Settings->General->SQL Server and click Add SQL Instances
Enter the SQL instance name and click Add button.
Once the SQL Server instance is added, you can manage and monitor the SQL jobs from BizTalk360.
Note: The instances from the SQL server should belongs the same domain.
Licensing
The number of SQL servers and SQL instances you can add is based on the licensing tier.
Gold tier - 4 SQL servers.
Platinum tier - 8 SQL servers.
Contact license@biztalk360.com to monitor more SQL servers.