BizTalk360 provides the ability to integrate with JIRA, enabling automatic creation of tickets whenever a violation occurs in your BizTalk environment. This integration ensures that every issue is instantly logged and tracked in JIRA, allowing support teams to take immediate action without manual intervention.
In a BizTalk environment, issues such as failed message processing, suspended service instances, or inactive receive locations can directly impact business operations. Jira Notification is implemented to push the monitoring issues to the team’s collabrative platform.
BizTalk360 continuously monitors these components using alarms. When any violation occurs:
System detects the issue through alarm monitoring
A JIRA ticket is automatically created with details such as error description, timestamp, and affected components
BizTalk360 supports secure authentication mechanism using
API Token
OAuth
How to integrate Jira channel in BizTalk360?
Configure JIRA Notification Channel
Navigate to Settings → Notifications → Notification Channels.
Click Add Notification Channel and select JIRA.
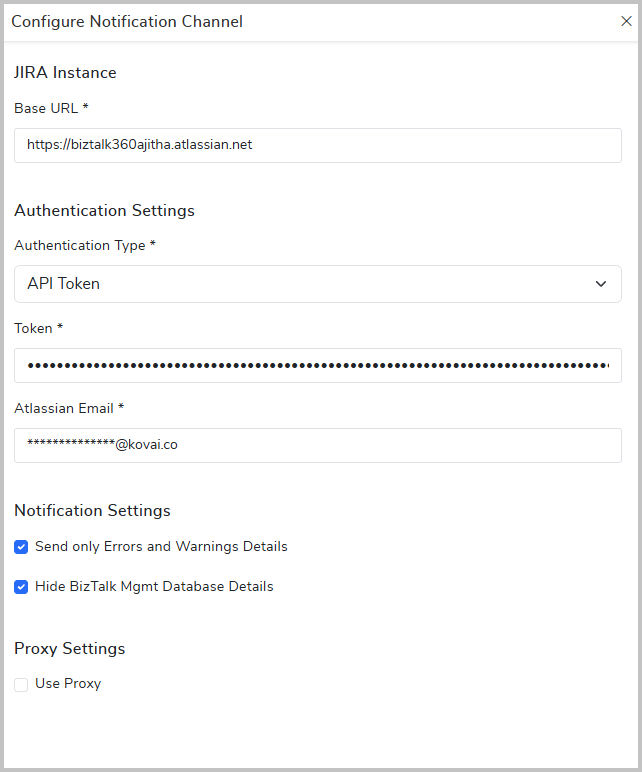
Configure JIRA Instance : In the JIRA Instance section: Enter the Base URL of your JIRA instance (e.g., https://yourcompany.atlassian.net)
Authentication Settings :Select the authentication type that aligns with your organization’s security requirements.
API Token Authentication
-Select Authentication Type as API Token and Provide the following details:
-Token – Enter the JIRA, API Token
-Atlassian Email – Enter the associated JIRA account email
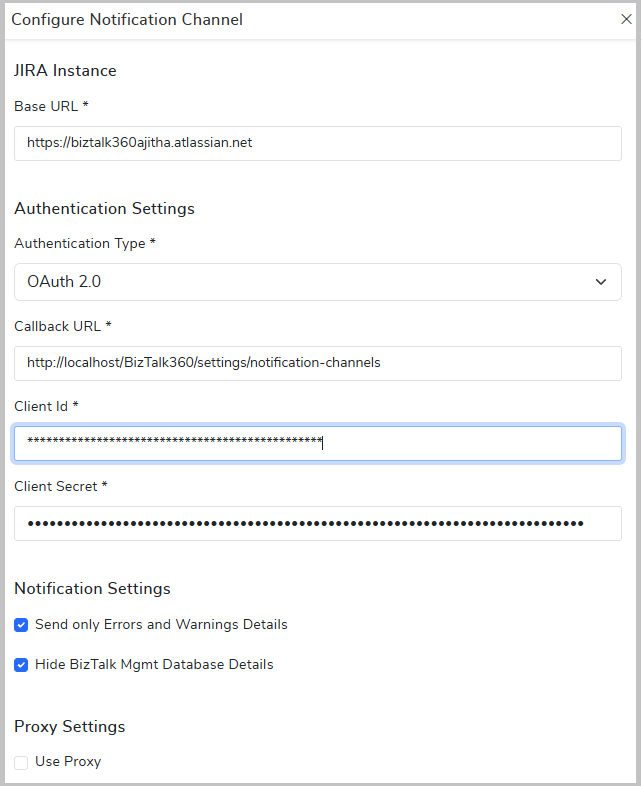
OAuth 2.0 Authentication
-Select Authentication Type = OAuth 2.0 and Provide the following details:
-Callback URL –Use the URL displayed in BizTalk360 (e.g., http://localhost/BizTalk360/settings/notification-channels)
-Client ID –Enter the Client ID generated from JIRA (Atlassian Developer Console)
-Client Secret –Enter the Client Secret associated with the Client ID
-Ensure the same Callback URL is configured in your JIRA (Atlassian) OAuth app settings.
Note - Callback URL & Scopes
Provide a callback URL that is accessible via the BizTalk360 application, for example:
https://<your-domain>/biztalk360/settings/notification-channels
Configure the following OAuth scopes in Atlassian:read:jira-work write:jira-work offline_access read:jira-user
Notification Settings
Consider only Errors and Warnings Details – Enable to create tickets only for Error or warning violations
Hide BizTalk Mgmt Database Details –By enabling this the database details wont be logged in tickets
Proxy Settings (Optional)- Enable Use Proxy if your environment requires proxy configuration. You need to provide Proxy server,port and user crendential details.
Click Save to complete the configuration.
2)Enable JIRA Notification Channel in Alarm Configuration
After configuring the JIRA Notification Channel, enable it for the required alarm to automatically create tickets on violations.
Steps to Enable and Configure JIRA Channel
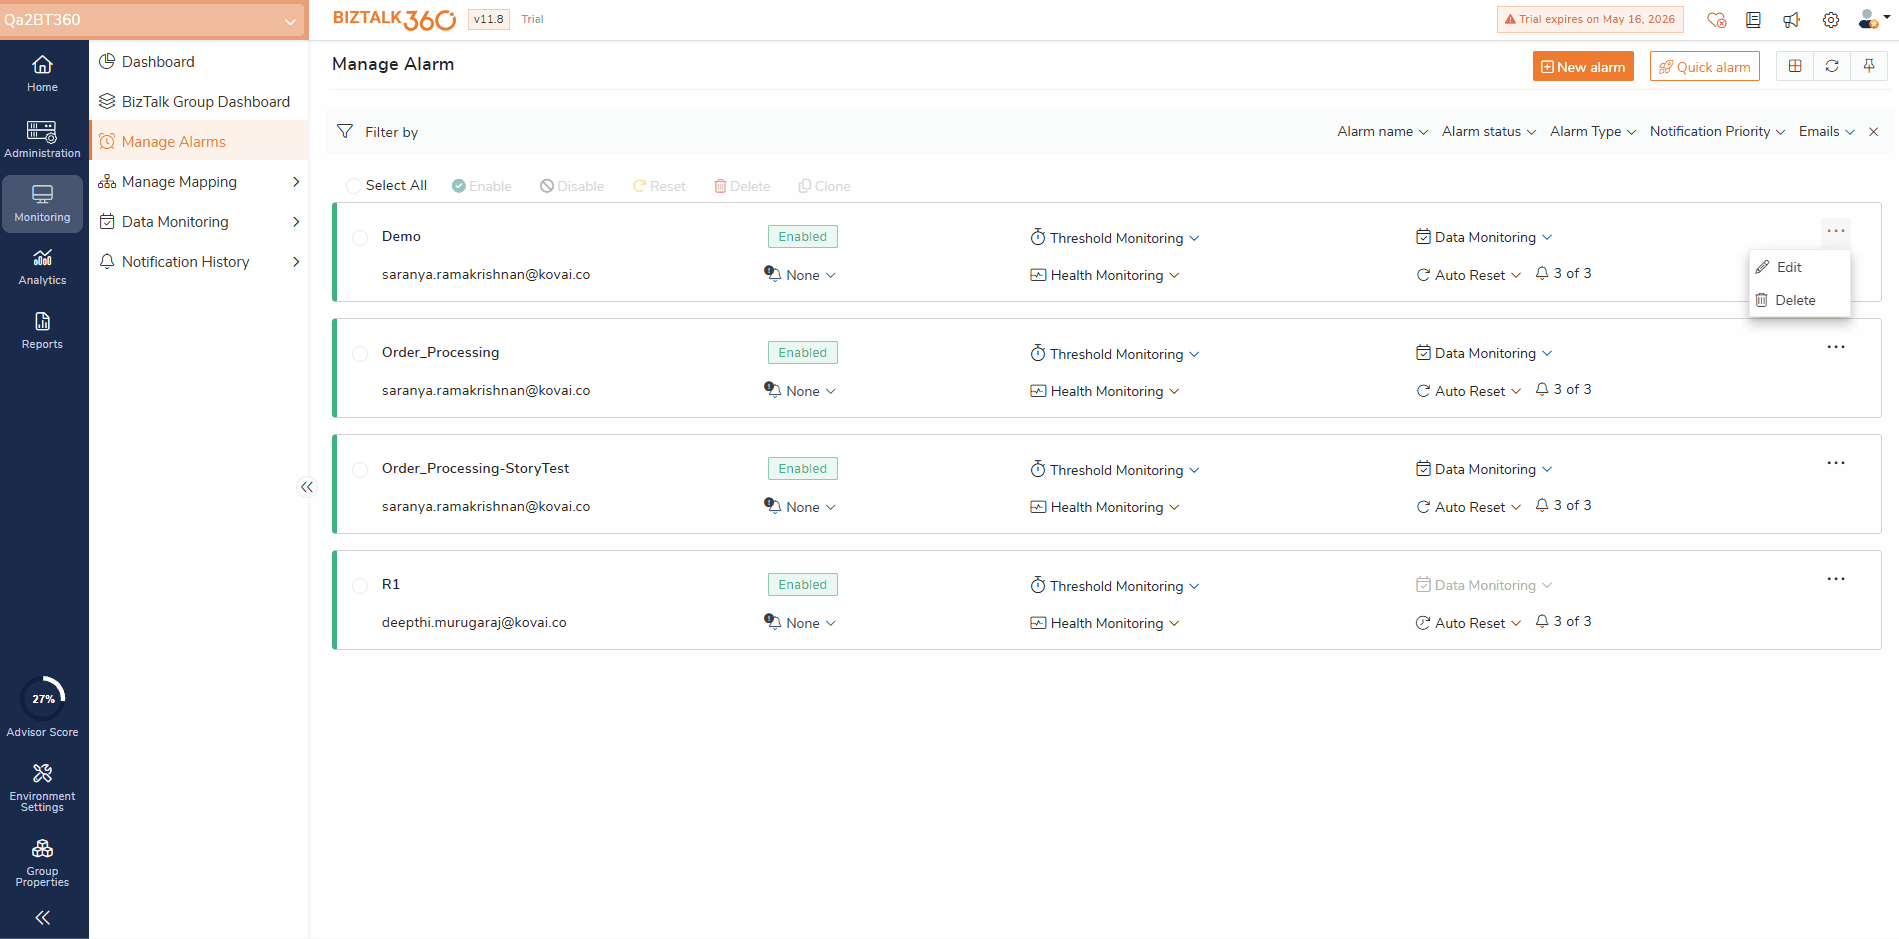
Navigate to Monitoring → Manage Alarms and select the required Alarm.
Go to the Notification Channels section and enable the JIRA channel.
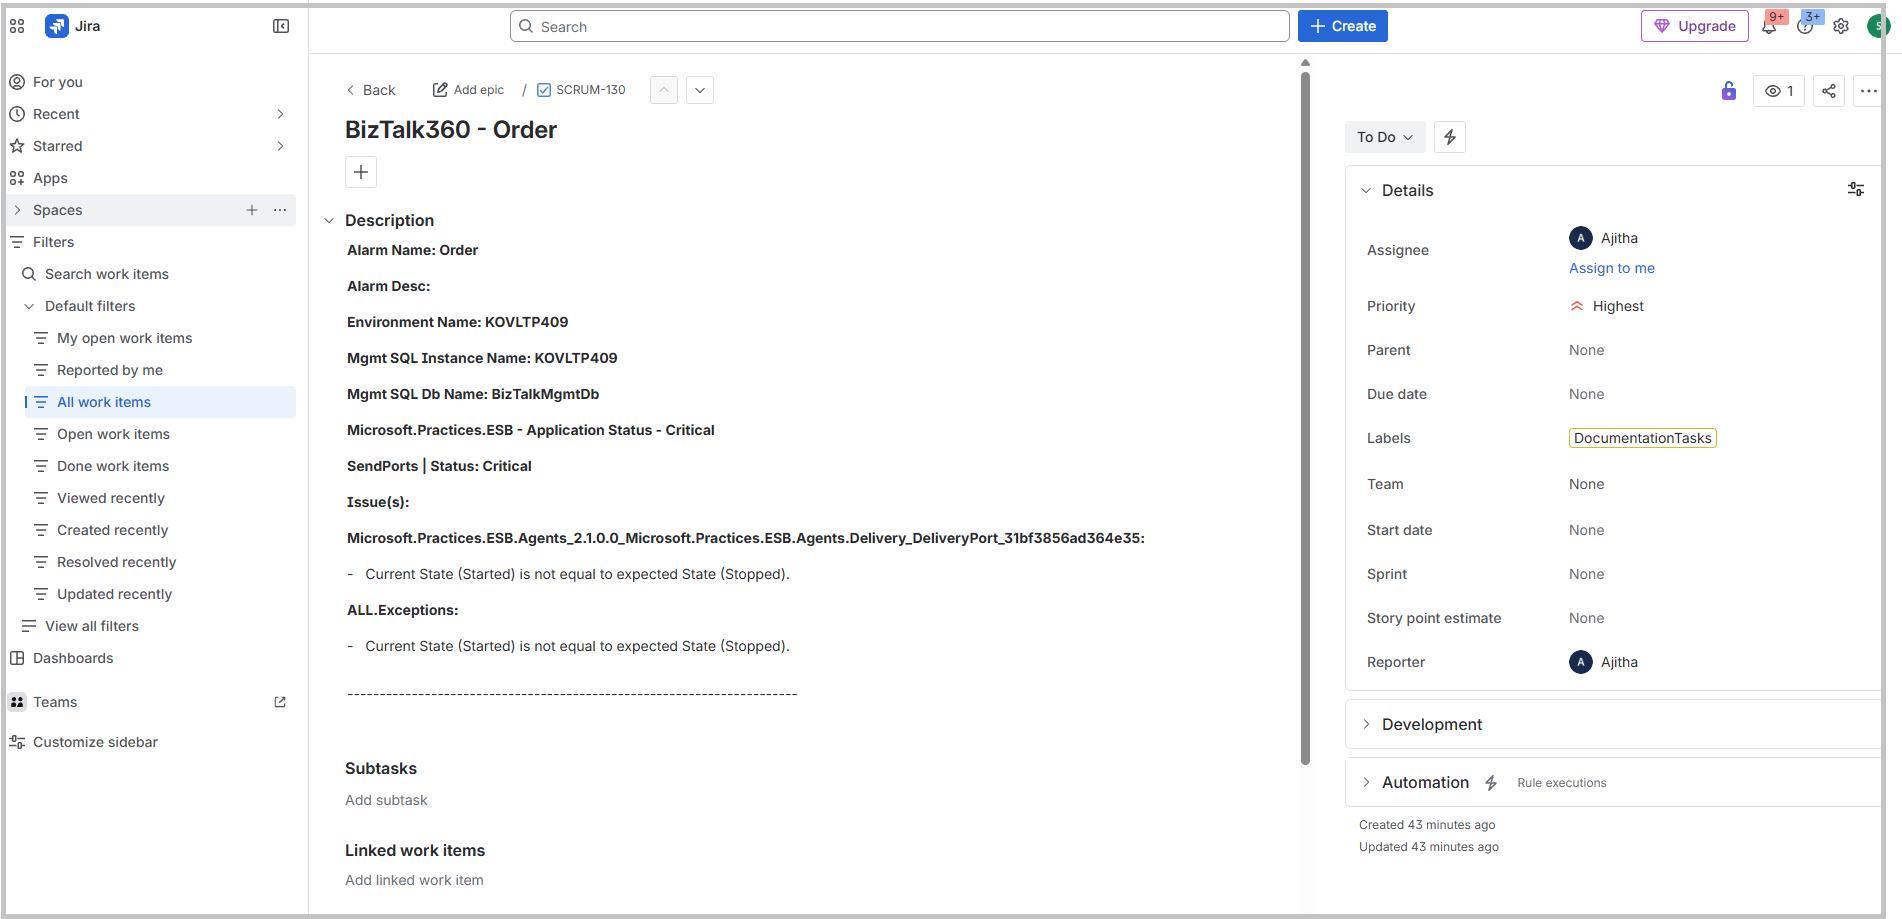
Configure the required ticket details: Title, Project Name, Work Type ,Assignee, Priority, Labels.
By default, the Alarm Name is included in the Title. You can also enhance the title by adding dynamic tags such as: Alert Type Alarm Name Environment Name Overall Status Escalated Level .
Once configured, whenever a violation occurs, a JIRA ticket will be automatically created with the defined details.
Here's an illustration of how BizTalk360 triggers alerts within Jira