To receive email notifications from BizTalk360, you first need to configure an SMTP server. This can be done from the SMTP Settings page, which provides options to configure the organizational SMTP settings.
Follow the steps below to configure SMTP:
Log in to BizTalk360.
Click 'Settings' (gear icon) on the left side of the screen.
Click the expand button against the 'Notifications' tab and click the 'SMTP' option. In that screen, you can enter the following information:
Login Type - Basic / OAuth (Office 365)
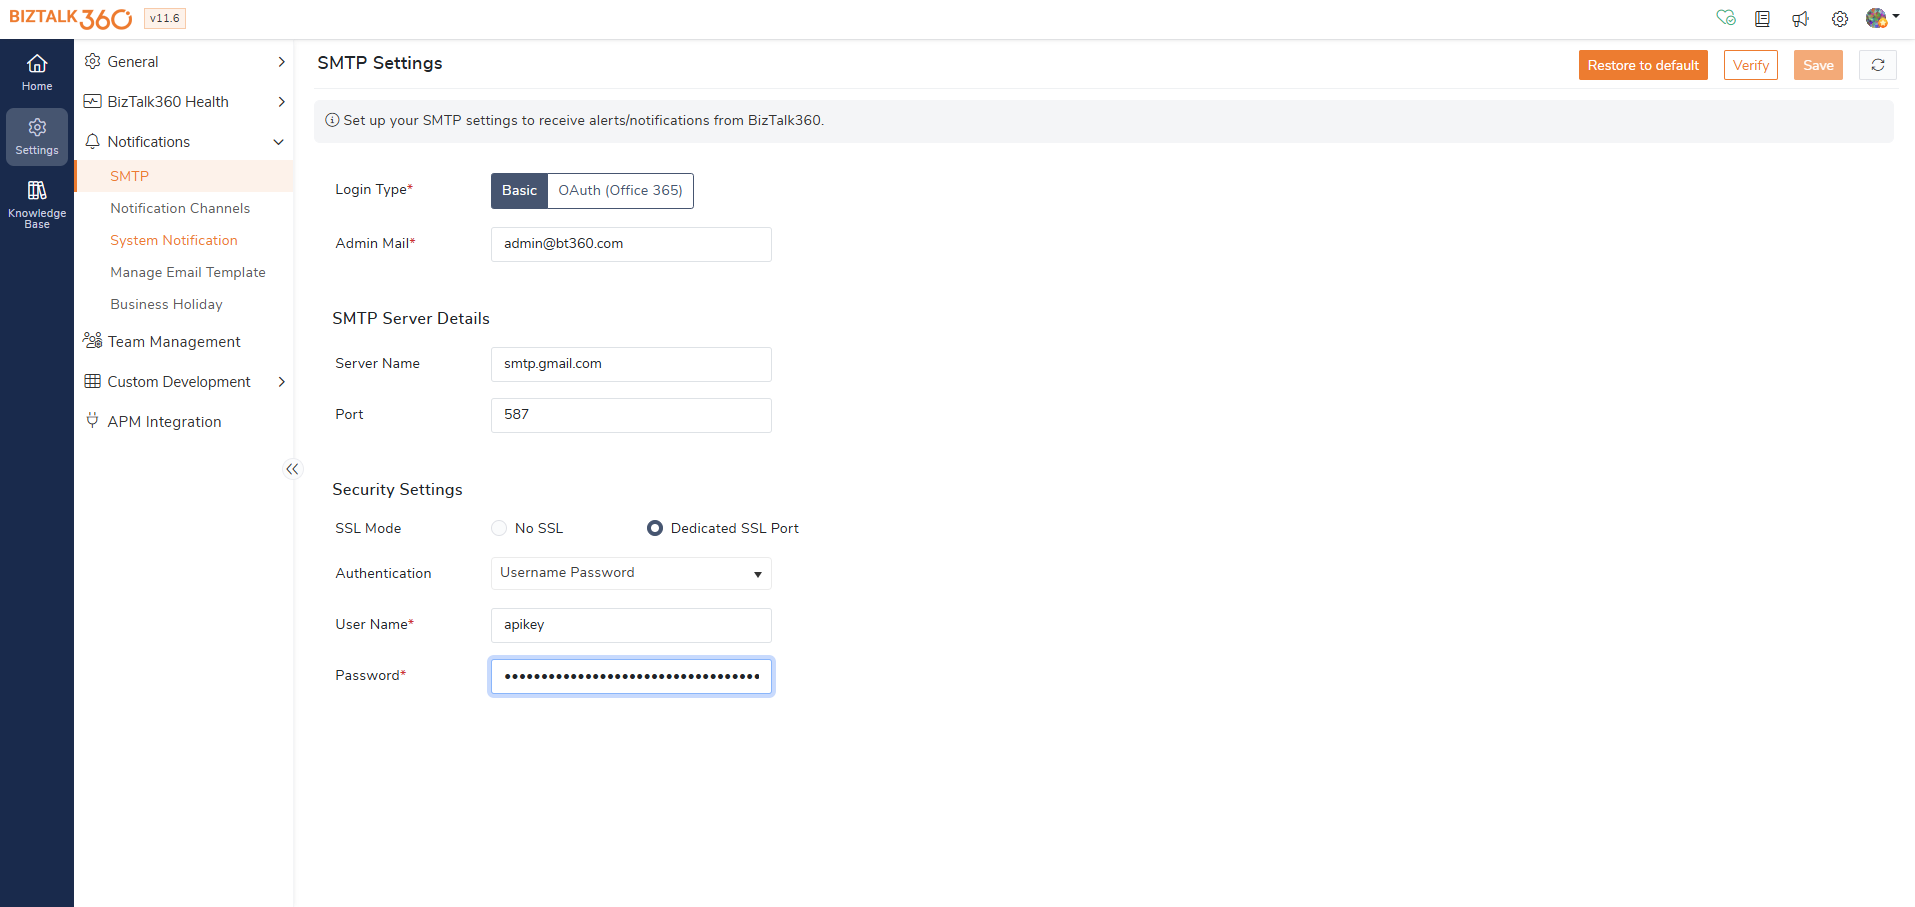
Follow the steps below to configure the Basic authentication
Admin Email - This is the admin email ID used for verification purposes.
Server Name - Your SMTP server name. Your network administrator must be able to provide it.
Port - In general, ports 25 and 587 are used for SMTP. If you use any other custom port, you can specify it here.
SSL Mode - The SSL Mode can be configured based on your SMTP server capabilities.
Authentication - Choose the correct authentication mode supported by your SMTP server. It could be Anonymous, Username/Password, or Integrated Windows Authentication. If the Username/Password option is chosen, you need to provide the correct Username/Password values.
You can verify whether the entered values are working as expected by clicking the Verify button. If the email and SMTP information entered are invalid, BizTalk360 will display an error message.
Example: "The server has rejected authentication data sent by the client. The server responded: 535-5.7.8 Username and Password not accepted."
If the settings are correct, you'll receive a confirmation email at the admin email address you have provided.
Click 'Save' to save the SMTP settings information.
Click ‘Restore to default‘ to clear all the configured values
Configure Office 365
The Office 365 integration in BizTalk360 enables secure and modern email communication using OAuth-based authentication. As Microsoft has deprecated basic authentication, BizTalk360 now leverages OAuth for sending alerts and reports, ensuring stronger security, improved reliability, and compliance with enterprise standards.
Follow the steps below to configure Office 365:
Select OAuth (Office 365) as the authentication method and click Save.
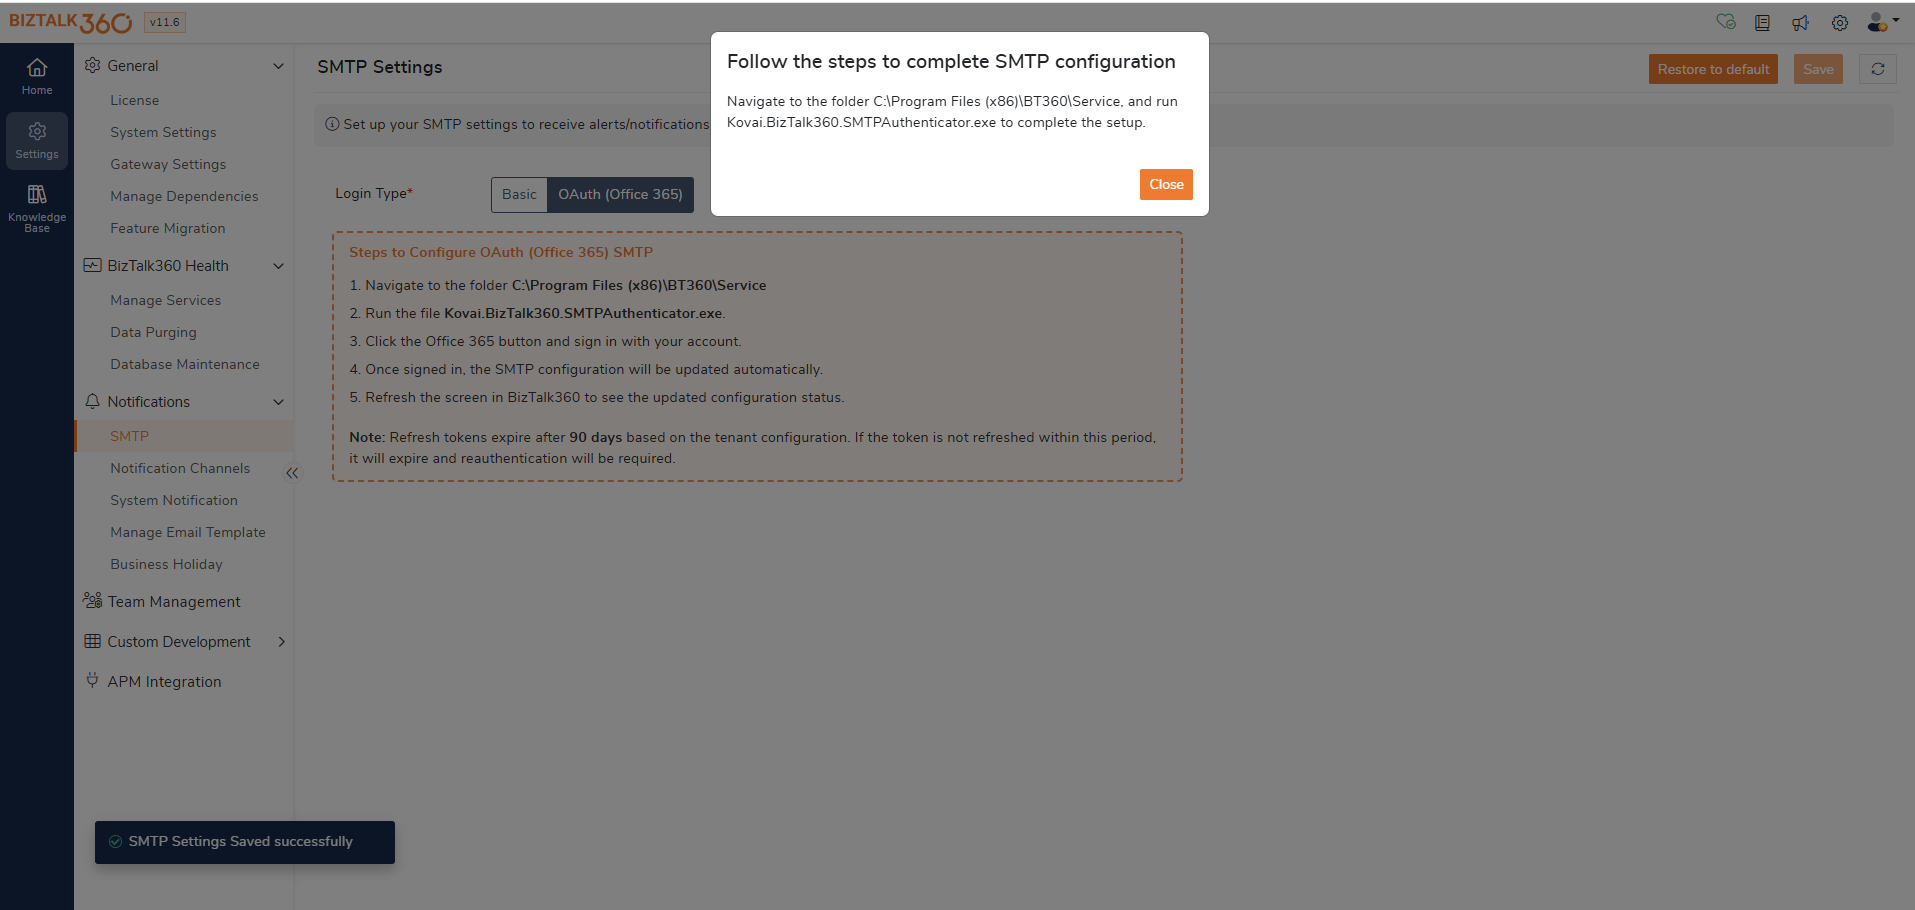
Run the inbuilt SMTP Authenticator:
Navigate to the installation path - C:\Program Files (x86)\BT360\Service
Run the executable file Kovai.BizTalk360.SMTPAuthenticator.exe.
In the Authenticator window, select Office 365 and enter the required account details.
Configure proxy settings (if applicable):
If a proxy connection is required, update the proxy details and enter the necessary credentials.
Selecting “Use default credentials” allows BizTalk360 to automatically use the configured credentials for the proxy connection.
Once configured successfully, the Office 365 account details—including Admin Email, SMTP Server, and Security Type—will be displayed in the BizTalk360 UI.
To clear the configuration, click Restore to Default.
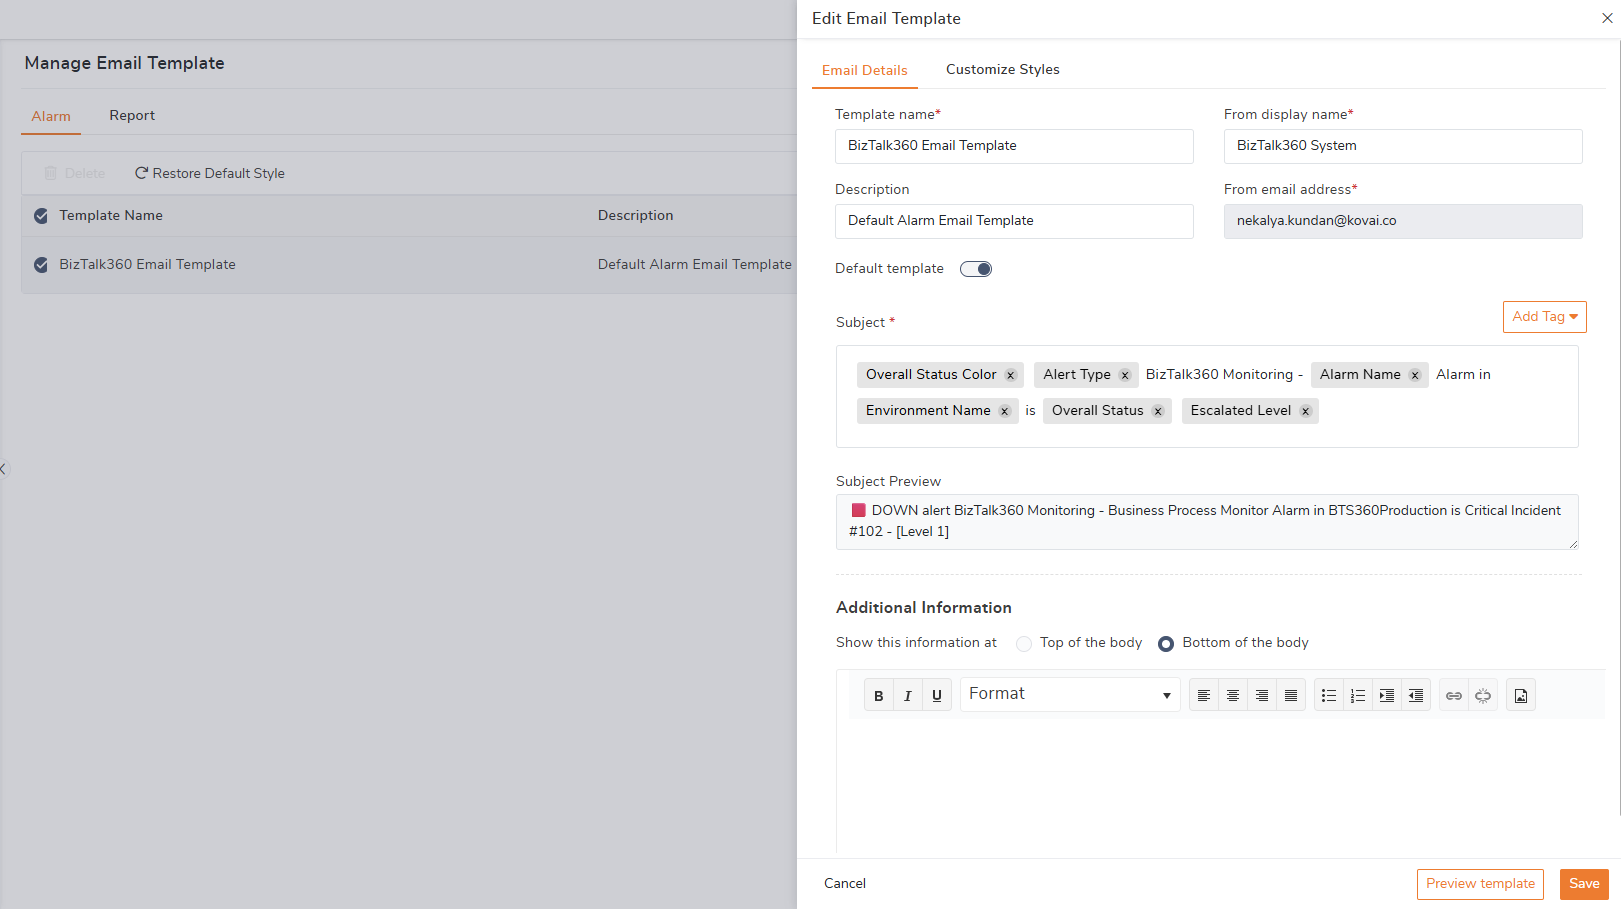
After Office 365 is configured, the “From” email address in all alarm and report templates will be updated with the configured email id automatically.